Configuring Forwarders
Forward Edge Device Data to my Endpoint
Table of Contents
What are Forwarders?
Forwarders are a construct within Device Manager for routing enriched location data from Edge devices to its final destination in an IoT software platform. Edge devices must first send raw data to Device Manager, which then sends it onwards to the Location Engine using a Connector. Once processed within the Location Engine, a Forwarder will direct the enriched data out to your IoT software platform.

Traditionally, location trackers use Global Navigation Satellite System modems to listen for satellite signals while decoding and processing that information on the GPS module. This is a great approach when GNSS is the only method of locating a device, as it can actively extend its scanning time to ensure a certain accuracy. However, in cases where a good fix cannot be obtained, repeated or extended scans can consume a lot of battery life. By contrast, our series of Edge devices scan for GNSS, WiFi, and Cell tower information for a fixed duration without processing any of it within the device. This raw data is sent to Device Manager for subsequent processing in our cloud-based Location Engine, which performs a large number of functions to resolve the position. This data is then forwarded to the endpoint (i.e. your server).
This results in exceptionally long battery life for our Edge devices - and the multiple positioning methods allow for locations to be obtained when GNSS is unavailable (i.e. indoors).
This article shows the steps to configure enriched 'Edge' device data (i.e. Yabby Edge Cellular) to be sent to your endpoint - via the Location Engine. For more information about the Location Engine - see The Location Engine - Key Concepts
Please note: when it comes to your integration options for Edge device data, the only available data format is HTTP JSON (the device TCP contains unresolved raw data). For technical payload integration documents please contact Digital Matter Support.
1. Setting up a Forwarder
Once the Location Engine receives and processes Edge device data, it needs instructions about where to pass that structured information so that it can be used in the same way as non-Edge data. Within Device Manager, we provide these instructions by setting up a Forwarder.
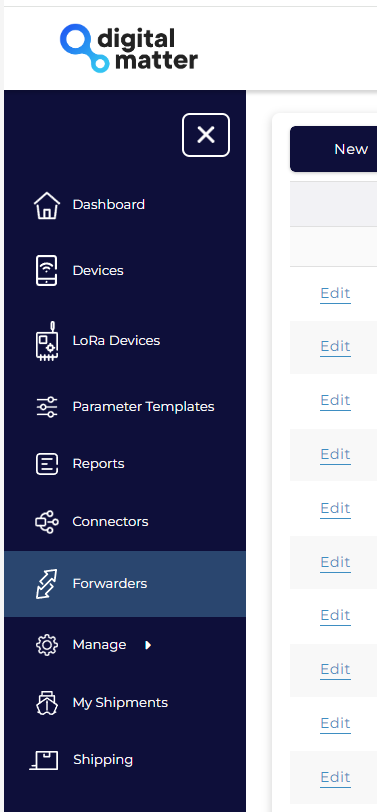
- Click on the Forwarder tab in Device Manager.
Permissions
Your account will need the Forwarder Manager permission to see this option. Please contact our support team to have this enabled.
2. Click the New button in the top-left corner of the Forwarder Grid.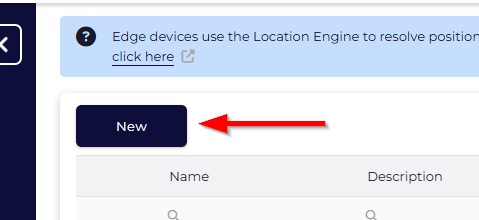
3. Within the Create New Forwarder popup begin by completing the following fields:

-
Name - any meaningful name
-
Description - any useful description
-
Forwarder Type
-
HTTP/S Forwarder - will output HTTP/S JSON data (same as a Connector)
-
Splitter Forwarder - same as a split Connector, allows sending to two previously created Forwarder endpoints.
-
Dig Forwarder - For Geotab Users
-
HTTP/S Forwarder - will output HTTP/S JSON data (same as a Connector)
- URL - your URL endpoint
4. For the next checkbox Batch Mode, you will need to ensure that your endpoint is capable of receiving a collection of records. Batch Mode is a feature that allows for multiple records to be uploaded in a single HTTP call. Doing this allows the messages to be sent with less overall latency and higher throughput. When this is enabled, you will receive an array of messages. The number of messages sent in a single batch is variable and could be a single message as it depends on the rate that they are received. The messages are sent in the order that they are received and therefore would usually come from multiple different devices. It is recommended to acknowledge the HTTP request with a 200 even if the device is not currently configured in your system.
5. Choose your Authentication Type - there are 3 options available, basic, bearer token and custom authentication.
-
Basic Authentication
- In the Authentication Type drop-down, select Basic Authentication.

- Enter the username and password as required, as well as any headers.
- In the Authentication Type drop-down, select Basic Authentication.
-
Bearer Token Authentication
- In the Authentication Type drop-down, select Bearer Authentication
- Then, select the type of bearer authentication required.
-
Option 1: Standard
Add your bearer token into the space provided.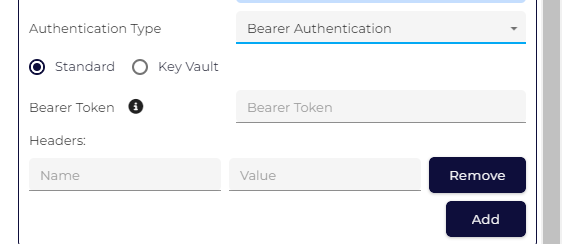
The standard Bearer Token is stored as an HTTP Header. Add any additional headers if required as per The HTTP/HTTPS Connector.
-
Option 2: Key Vault
Select the Key Vault, and click on Retrieve Bearer Token.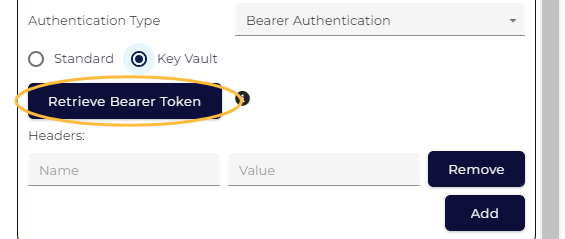
The Key Vault Bearer Token is retrieved from an endpoint using Basic Authentication and will not be visible to the user. Provide the URL and credentials for the endpoint where the Bearer Token will be requested. The token will not be visible, and if the credentials change, you will need to manually update them.
-
Option 3: Custom Authentication
This makes use of the custom fields to store a key per device. The Azure-IOT Hub Helper can be used to easily load these keys into OEM.
Also check out this article - The HTTP/HTTPS Connector - which shows various dynamic fields we can make use of. For example, if we set the URL to https://myserver.com/[SERIAL] - the serial of the device that is connecting will become part of the URL. This article also explains Bearer Token Authentication.
-
Option 1: Standard
- In the Authentication Type drop-down, select Bearer Authentication
6. Set your Device Group designation to control which Device Manager users will be able to see and use this forwarder.

7. You are now ready to press the OK button, which will trigger the system to send a test message to the URL that you specified earlier and using the authentication method that you selected. As this test needs to communicate with an external server, the results will not be instant, and you will see a spinning icon while the request is processed. If successful, the setup window will close and you will receive a message that the creation of the forwarder was successful. If the request was not successful, then you will receive an error message and the opportunity to change details in the setup window. Unfortunately, we cannot surface the specific reasons why a setup fails, as there are many, but if other testing systems like Postman are conversely successful in sending data with the same credentials, please reach out to Digital Matter support for help with further troubleshooting.
8. Once complete, you will be returned to your list of forwarders. Within the Forwarder Grid under the Partition column and against the row for your chosen Forwarder click Assign Partition.
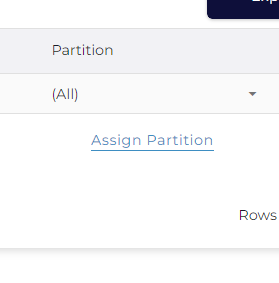
Assigning a partition activates your Forwarder. Each Forwarder represents a discrete message queue - which keeps all messages separate to ensure that if one endpoint is unavailable (i.e. expired authentication) other devices are unaffected.
Please note: To reflect underlying costs, there is a fixed charge per Forwarder created. For more information, please speak with your Digital Matter representative.
2. Create a Location Engine Connector
For more detail on creating connectors please see Create a Connector. For the Location Engine, we set up as follows:
-
Navigate to the Connector Grid via the Connectors option in the left-hand menu. Your user profile will require the Connection Manage permission - if you can't see the menu, please contact support.
- Click the New button in the top left corner of the Connectors Grid to open the Create New Connector popup.
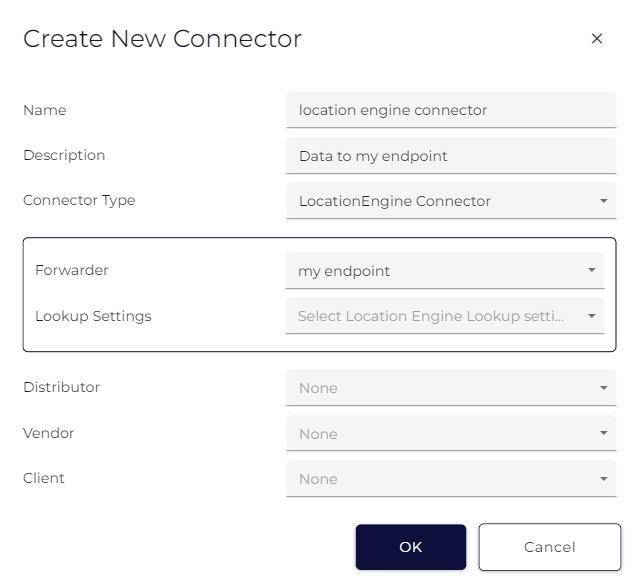
- Provide a useful name and description
- Ensure that your Connector Type is set to Location Engine Connector
- Select the Forwarder that you created previously
- Unless you have been granted the Location Engine Lookup Settings Manager permission simply select lookup settings and choose the Default option that you would have discussed with your Digital Matter representative. The first option, Default - [GNSS, WiFi Bundle +Cell] uses the following services in order.
- GNSS Lookups (LE-GNSS)
- Google Wi-Fi + Cell Tower Lookups (LE-WIFICELL-PER1K)
The above settings should work for the majority of applications. To adjust - contact Digital Matter support and we can create a new set of Lookup Settings. There are other options available at different price points per Lookup - but the accuracy varies.
- GNSS Lookups (LE-GNSS)
- Set your Device Group settings to control visibility
3. Set the Connector
Simply apply the newly created Connector to your device(s) as per usual. See our dedicated article for this process - Set the Connector
4. 'Splitter' Forwarder (Optional)
For standard GPS devices on Device Manager, if the data needs to be sent to multiple endpoints, a Multi-Connector is set to the device. The same can be done for Edge devices, however, the setup is slightly different.
- Navigate to the Forwarders section in Device Manager and create two different forwarders as per the steps above. If you are using Telematics Guru as one endpoint, then you only need to create one forwarder as the Telematics Guru forwarder will be present as a preset for your account.
- Create a third new forwarder, this time selecting Splitter Forwarder as the type
- Assign your previously created forwarders as Forwarder1 and Forwarder 2 in the fields that appear.
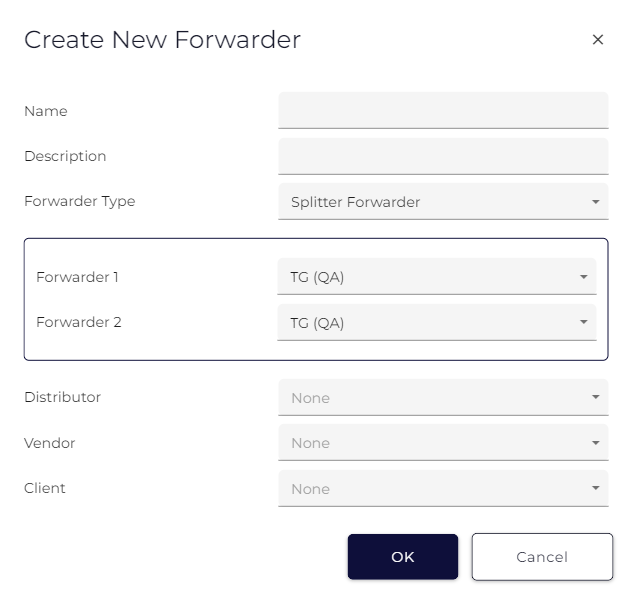
- Click OK to save your splitter forwarders, and then ensure that you assign a partition only for the splitter forwarder.
- Create a new Location Engine Connector via the Connector Grid (see steps above) and set your forwarder as the Splitter Forwarder just created.
- Set the Connector on your device(s) and an HTTP JSON payload will be sent to both endpoints.
Troubleshooting Forwarders
Similar to viewing server logs, we can check the forwarder logs to identify the issues in receiving the data from the Location Engine to the end platform. Please note that forwarder logs can only be seen if data capture is on in order to view the forwarder logs. Please see here for how to turn on data capture.
To view the forwarder logs:
- Navigate to the Device View page for your selected device.
- Select the "Forwarder Logs" tab

- Once in the forwarder logs option, you can use the datetime selectors to set the data and time range during which you want to review forwarder logs. The "now" option lets you see the logs from a past date to the current time.

Examples of how the forwarder logs will look are shown below. This means that the forwarder was able to successfully send data from the location engine to the end platform.
Please Note: By default, only errors are shown in the forwarder logs unless Data Capturing is turned on, in which case all logs will be kept (like the image below)

An example of a failed connection between the forwarder and the end platform could be as shown below:

Once you have set up Forwarders and Connectors for your Edge Devices, we suggest learning about how to understand the Location Engine Billing Report.
