Device Manager (OEM Server) - Getting Started

Written by Matthew Clark-Massera
Updated at May 30th, 2024
Table of Contents
OEM Server → Device Manager
Device Manager is brand new as of 2024, our redesigned version of OEM Server (oemserver.com). Currently, both systems are running in parallel (actions in either apply to devices). OEM Server will be deprecated in future (there will not be any significant impact other than a UI change). For more details, see Device Manager FAQ
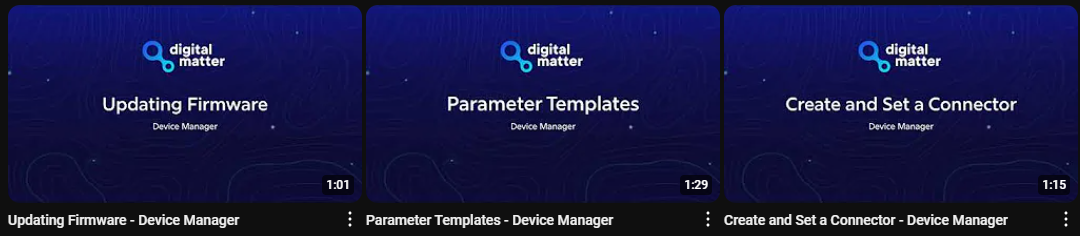
Check out our Getting Started Series for highlights of the improvements we've built into Device Manager!
Device Manager (devicemanager.digitalmatter.com) Provides a device management service for Digital Matter devices with the following useful features:
- A flexible data conduit to the end customer’s choice of software system
- Multi-tier device grouping for group level management
- Device firmware management for Over The Air (OTA) firmware management
- Device parameter management
- Device health monitoring
- Manufacturer level debugging providing the best insights into what a device doing
The interface empowers customers to engineer their desired outcome even for the most complex configuration requirements. This guide will introduce some of the Device Manager admin interface basics.
Before you Start
The interface is available to Digital Matter Partners. See https://www.digitalmatter.com/partners/ for information on become a partner.
You will need a username and password allocated for your account, if you do not have one, contact your account administrator or our support team.
The Installer Page
The installer page is designed to verify that an installation has been done correctly by an installer in the field.
Note that since this page is not password protected, it is designed to not give any sensitive information away.
The Dashboard
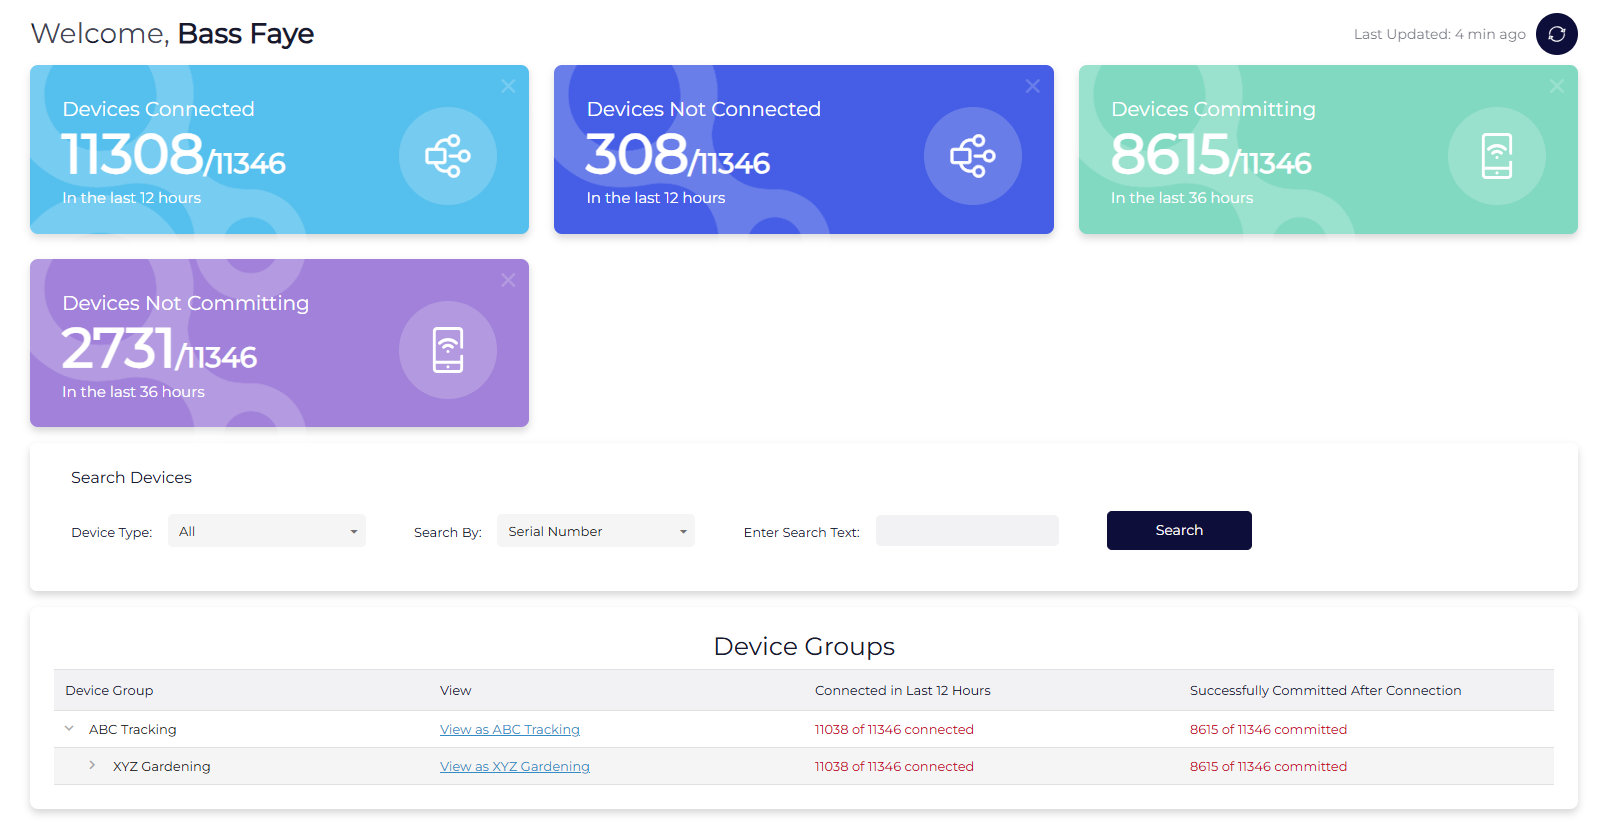
When first logging in, you will be taken to the dashboard
Customise the Dashboard
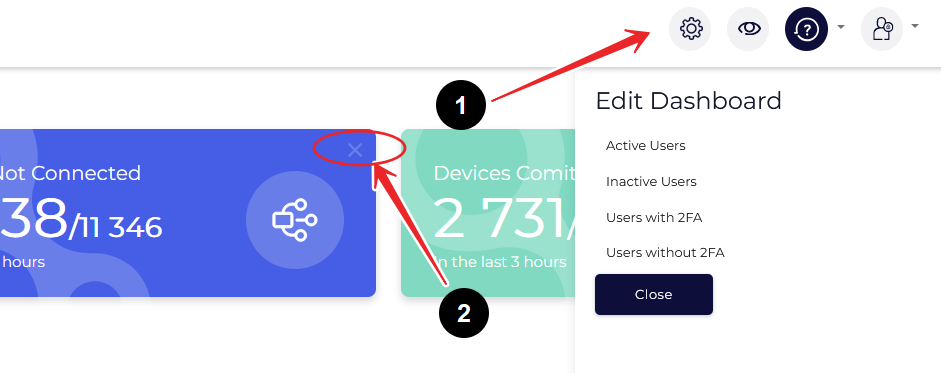
Dashboard cards can be customised:
- Click the gear icon in the top right of the page to add a card
- Click the (X) on any card to remove it.
Searching, Selection and Filtering
There are several ways to filter and search for your devices.

You can Filter by Device Type

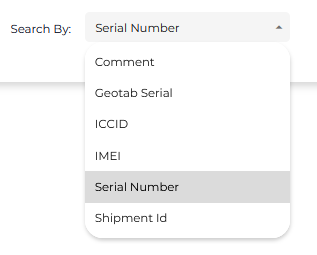
Search by serial number, comment, ICCID, and more.
Or type in a value or multiple values (comma separated) such as serial numbers, to search for several devices at the same time.
The search box supports pasting a list of serials, IMEIs or other copied from Excel.
The Serial and IMEI of each device is printed:
- On the side of the device gift box
- On the device housing itself
- On the device PCB
To navigate to all devices of a certain type (i.e. all of your Barra Edge devices) - simply leave the search box blank and click ‘search’.
The Device Grid
After searching, you will be taken to the Device grid.
Swap between common column pre-sets using the tabs.
Rearrange columns to suit your preferences.
Each column can also be sorted and features its own search functionality.
For example, we can search for devices that have a battery voltage of less than 3 Volts.
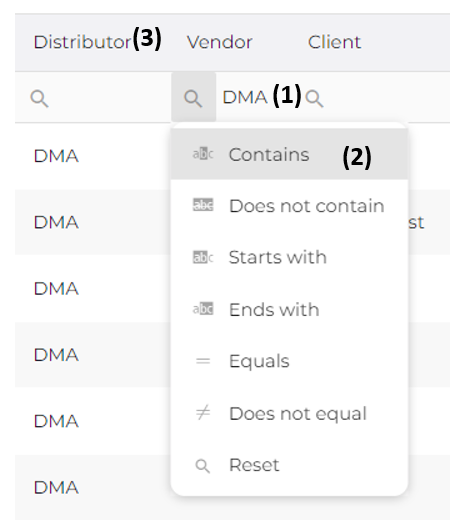
Filtering and sorting is done using the fields at the top of the columns:
Device Manager
- Enter filter text
- Click the pin to specify how the filter is applied
- Click the column heading to change the sort column and order
Notes on filtering: Filtering is only text-based now. If you filter out devices that are already selected, they will still be selected in the background. This can lead to some unexpected behaviour if applying settings after filtering. Be sure to update the selection after applying a filter.
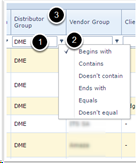
OEM
- Enter filter text
- Click the pin to specify how the filter is applied
- Click the column heading to change the sort column and order
Notes on filtering: Filtering is only text based now. If you filter out devices that are already selected, they will still be selected in the background. This can lead to some unexpected behavior if applying settings after filtering. Be sure to update the selection after applying a filter.
Connected Versus Committed
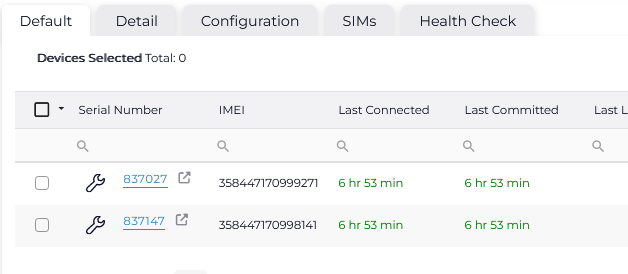
-
Last Connected gives the time since the device last connected to Device Manager.
- Connected simply means a 'Hello' message was sent from the device to the server.
- If it has connected recently, it will be green.
- If the device hasn't connected for a while, the colour will change to red.
- Last Committed gives the time since the device last uploaded data records. If the device has a connector set, this implies that data was successfully sent to the connected software platform, E.g. TG.
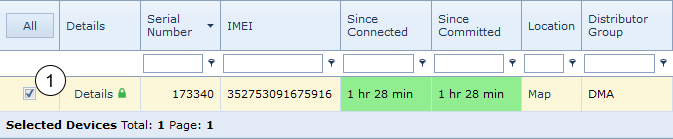
Different scenarios and the meaning of last connected and last committed:
- When working correctly, most devices will have green since connected and since committed dates
- If the device cannot connect, or has no power, the Last Connected and Last Committed dates will both appear to be old.

- If the device is connecting, but cannot send data to the connected software platform, the Last Connected date may be green, but the Last Connected date may be orange or red. If this happens, check if the device setup correctly on the connected software platform. Check the serial number and device type.
In general:
- Device Not Connecting = Connectivity issue, due to coverage, flat battery or other.
- Device Not Committing (but still connecting) = issue uploading data to the end server (not configured correctly this end, or an integration issue)
Editing Individual Parameters
Parameters are settings that affect the way the device operates. They are setup on the OEM Server, and downloaded by a device next time it connects.
The difference between Admin Parameters and System Parameters:
- Admin Parameters: Connectivity settings, such as server and APN settings.
- System Parameters: Device behavior settings such as heartbeat period, tracking frequency, etc.
To Edit Parameters:
OEM
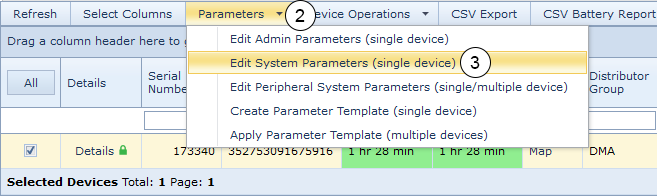
- Select an asset (1). Only one asset may be edited at a time. Refer to templates for multiple assets.
- Go to Parameters (2); Edit System Parameters (3) or Edit Admin Parameters
Default Parameters
If no parameter sections are shown, the device will use it's defaults. The defaults are shown when you add a fresh section.
To add Parameters got to Add Parameters (4) and choose a parameter section to add (5).
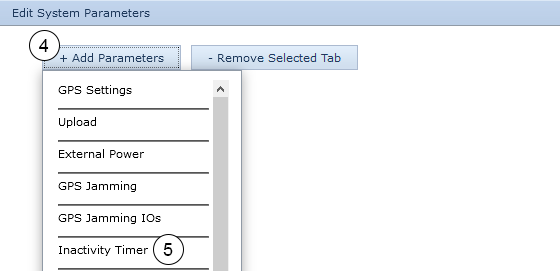
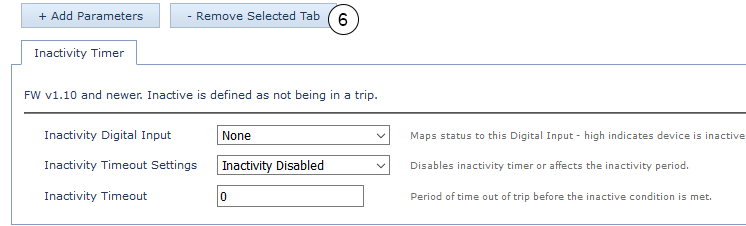
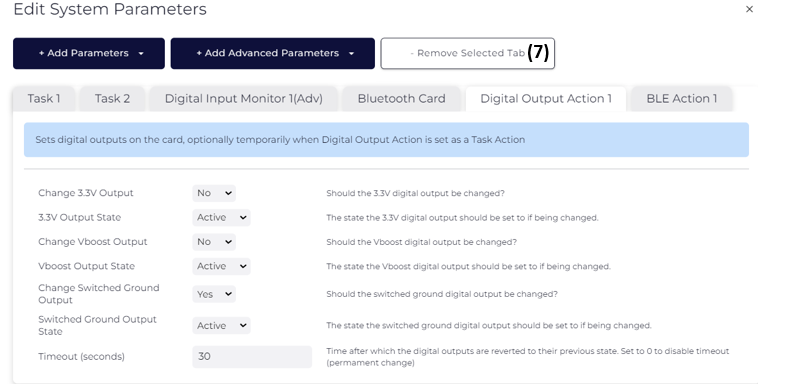
To Remove a Parameters Click on Remove Selected Tab (6). This will revert the section to the device defaults.
Device Manager
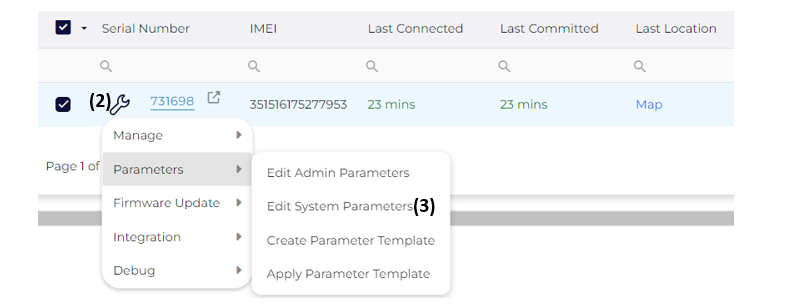
- Select an asset (1). Only one asset may be edited at a time. Refer to templates for multiple assets.

- Go to the spanner icon(2); Parameters, then Edit System Parameters (3) or Edit Admin Parameters
Default Parameters
If no parameter sections are shown, the device will use it's defaults. The defaults are shown when you add a fresh section.
To add Parameters got to Add Parameters (4) and choose a parameter section to add (5).
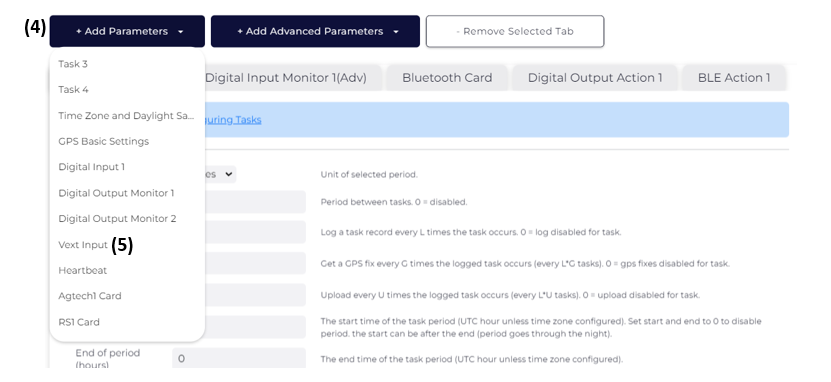
To Remove a Parameters Click on Remove Selected Tab (6). This will revert the section to the device defaults.
Extra Resources
Device Manager
Setting Firmware
Firmware is software programmed onto the device. It is called "firmware" because it runs on an embedded system, like a tracking device, and updating it requires a set procedure. This is handled by the interaction between the device and the OEM server. Vendors are responsible for non-critical firmware updates. DM will only apply updates to fix critical bugs. Firmware is normally versioned with a Major Version and a Minor Version. The Major Version often specifies different functionality for a device. The Minor Version is incremental, and progresses as features are added or bugs are fixed.
Warning
It is not advised to perform bulk FW updates without first testing on a handful of devices.
We make every effort to thoroughly test all new FW updates before releasing, but unforeseen/undetected bugs are possible. It is best to roll a few devices up to the latest FW, see how they go after a day or so, and then the rest can be updated in one go. This means should the unthinkable happen, and a FW update causes devices to stop connecting (remote chance but possible) not all devices will drop out.
Upgrade Process
To upgrade to a new firmware version, first select a device from the device grid then click on Device Operations and ‘Set Firmware’
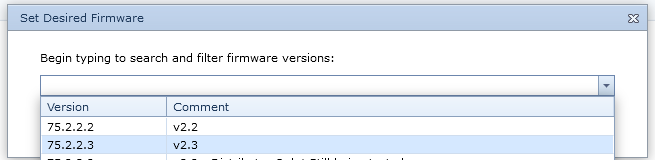
Then select the desired firmware version to upgrade to.
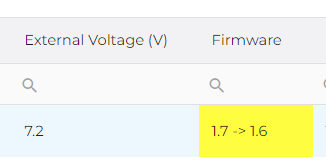
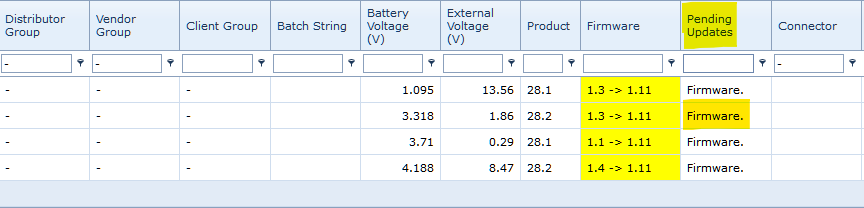
A 'Firmware' Pending update will appear in the device grid column. Once the device has it's next upload, it will sync with OEM Server and download the new firmware.
Parameter Templates
Parameter templates are a collection of settings that can be applied en-masse to a fleet of the same device type. You can have either Admin Parameter templates that consist of connectivity settings, or System Parameter templates that consist of settings that control how the device operates. Once a template is created, it cannot be edited. If settings must be changed you must edit the settings on a device and create a new template. You can delete an old template by clicking on Parameter Templates in the navigation bar.
Create a template
When creating a parameter template, the general process is described below, with a video of the process at the end:
- Edit an individual device. Setup the parameters as you require them on a single device
- Create a parameter template based on this single device. This will create a snapshot of its settings
- Apply the template to multiple devices to replicate those settings to all of the devices.
First step is to set up the individual parameters on the first device, you can see this process above in the main OEM Getting started article body.
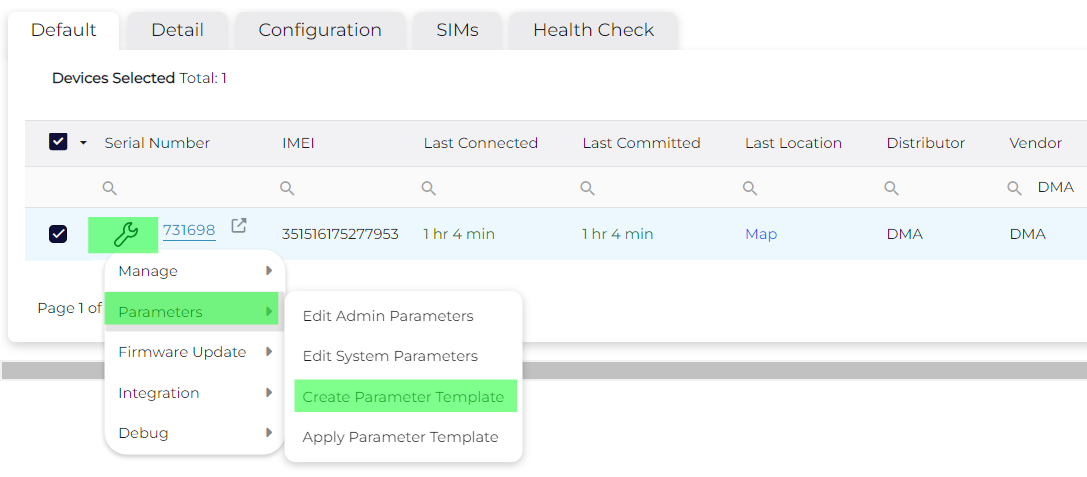
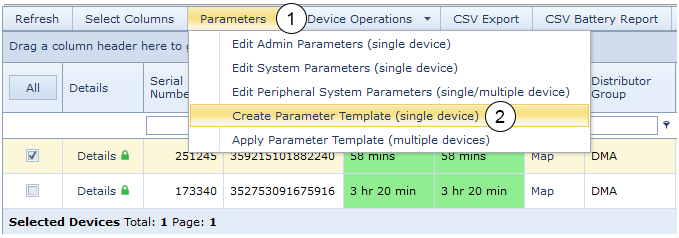
Then select your device, and go to ‘Parameters’ and click 'Create Parameter Template (single device).
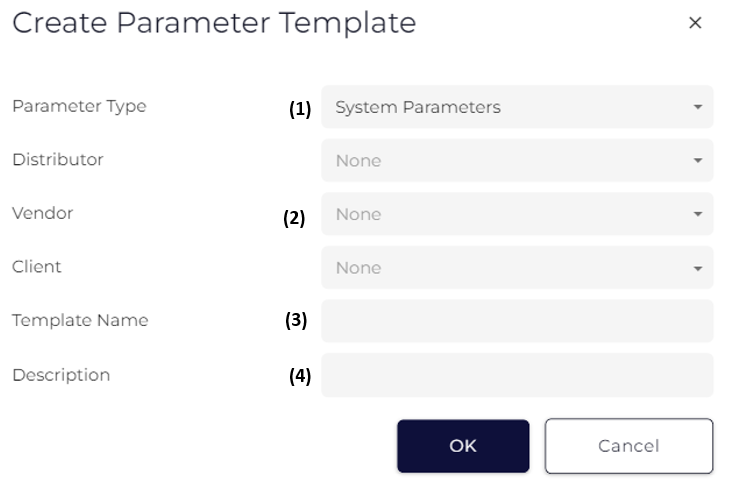
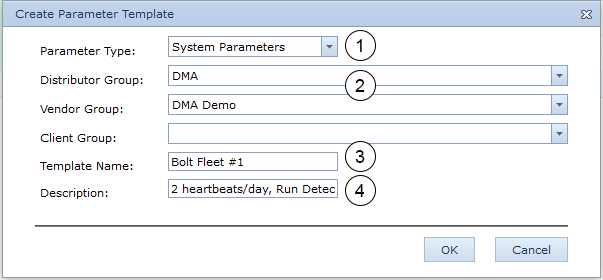
You can select whether you wish to save the current device's System parameters or Admin parameters (1) then where you wish to save the template (2). This can be helpful if you have a) many templates or b) specific templates used only for one client group. Then you can name the template (3) and provide an adequate description (4) that helps you identify the template from a dropdown list.
Applying a Parameter Template
Once you have created a parameter template as above, you can select as many devices of the same type as you need and bulk apply the settings.
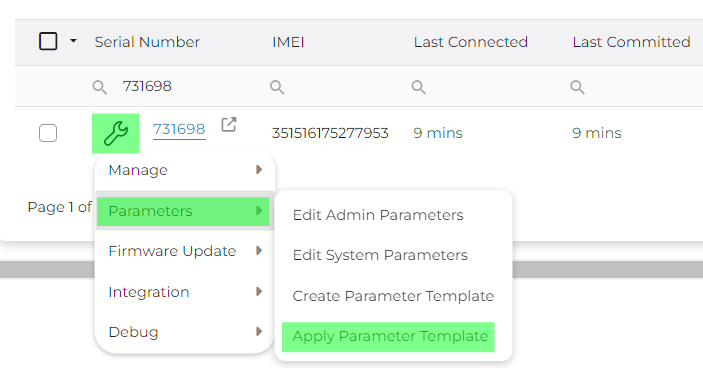
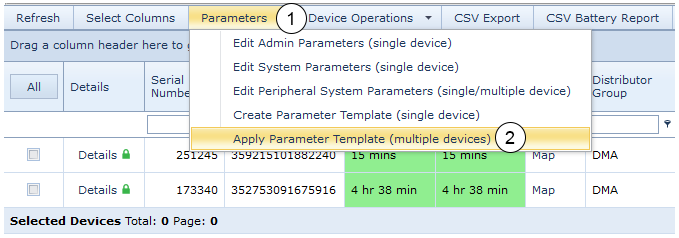
Click the spanner, go to Parameters, and select ‘Apply Parameter Template’.
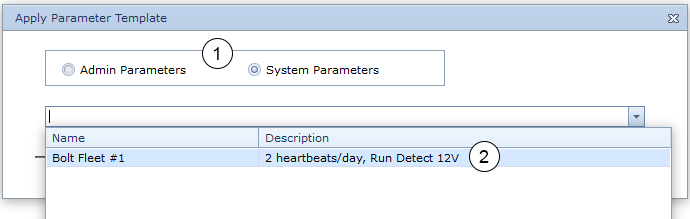
Then select which type of template you have; Admin or System and select the specific template from the dropdown list.
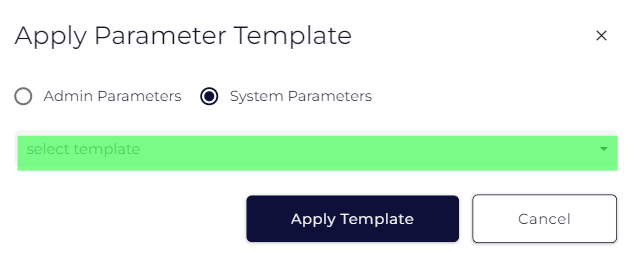
Then select “apply template”.
Setting a Comment
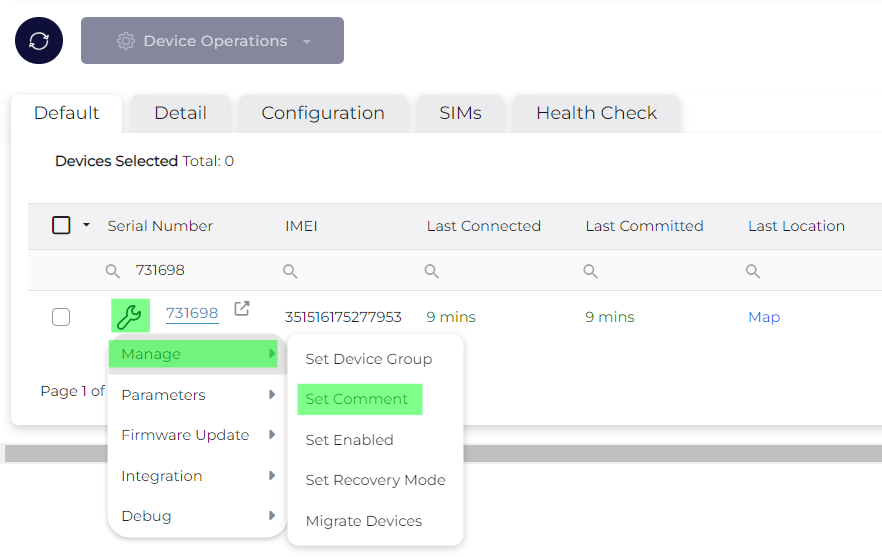
Setting a comment is a handy way to notate individual or multiple units to identify them. Simply select the unit in the device grid(1) then click the spanner, to to manage, and click Set Comment.
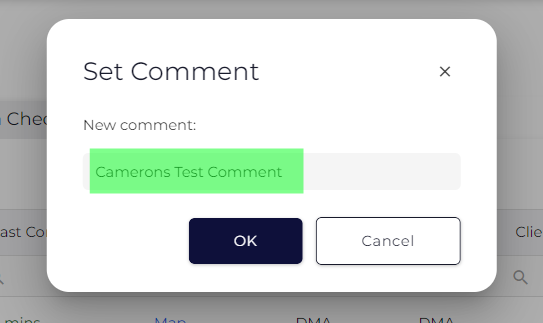
Once you've entered your description, click OK.
Assign Devices to Groups
Device groups are used to organize devices on Device Manager:
- The hierarchy is Distributor -> Vendor -> Client
- This typically equates to Distributor (Digital Matter Branch) -> Vendor (Reseller) -> Client (end user or organisation)
- Users can only see the devices assigned to their group.
- New groups can not be created at this time, this can only be done by the admins at DM.
- Client groups can be created by users with the "Client Creator" permission.
- If a device serial can not be found it might be in the wrong group. Contact Digital Matter for assistance.
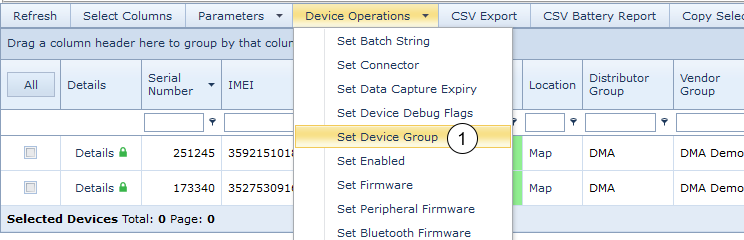
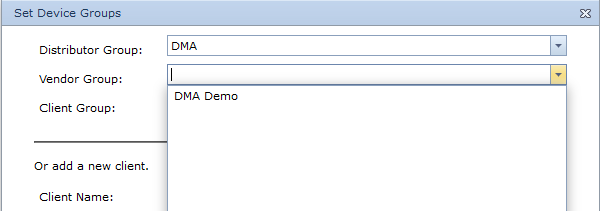
To Move a Device into a different group, select a device and open Device Operations then click 'Set Device Group'.

- You can then select the Distributor and Vendor organisations (usually only one) and a client organisation to move the device to.
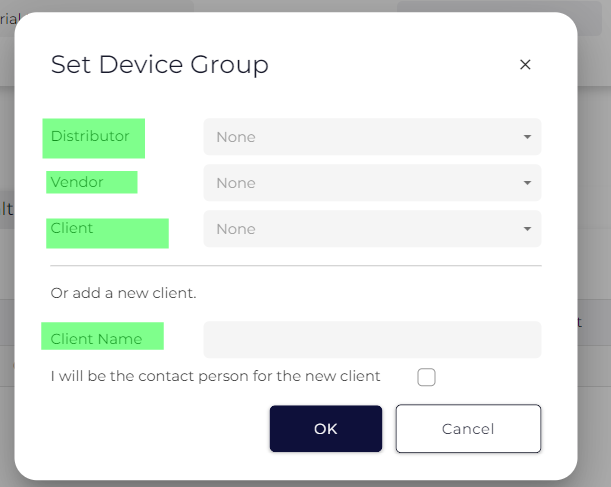
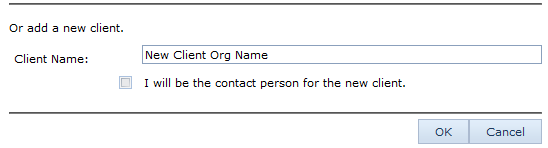
- Here you can also create a new Client group to allocate devices to (if you have the client creator's permission)
Can't Get Connected?
OEM
For more advanced OEM walkthroughs, choose from the following:
Setting Firmware
Firmware is software programmed onto the device. It is called "firmware" because it runs on an embedded system, like a tracking device, and updating it requires a set procedure. This is handled by the interaction between the device and the OEM server. Vendors are responsible for non-critical firmware updates. DM will only apply updates to fix critical bugs. Firmware is normally versioned with a Major Version and a Minor Version. The Major Version often specifies different functionality for a device. The Minor Version is incremental, and progresses as features are added or bugs are fixed.
Warning
It is not advised to perform bulk FW updates without first testing on a handful of devices.
We make every effort to thoroughly test all new FW updates before releasing, but unforeseen/undetected bugs are possible. It is best to roll a few devices up to the latest FW, see how they go after a day or so, and then the rest can be updated in one go. This means should the unthinkable happen, and a FW update causes devices to stop connecting (remote chance but possible) not all devices will drop out.
Upgrade Process
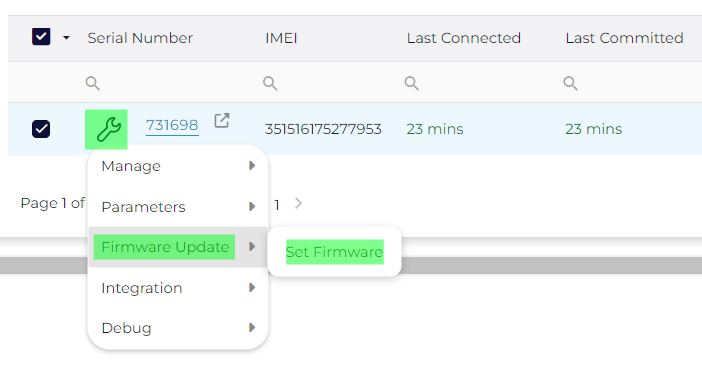
To upgrade to a new firmware version, first select a device from the device grid then click on Device Operations (1) and 'Set Firmware' (2)
![]()
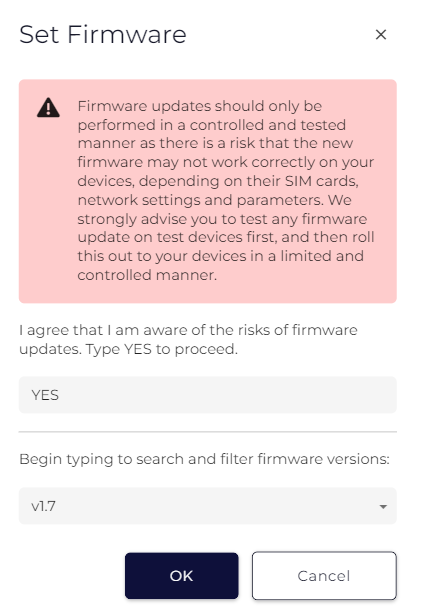
Then select the desired firmware version to upgrade to.
A 'Firmware' Pending update will appear in the device grid column. Once the device has it's next upload, it will sync with OEM Server and download the new firmware.
Parameter Templates
Parameter templates are a collection of settings that can be applied en-masse to a fleet of the same device type. You can have either Admin Parameter templates that consist of connectivity settings, or System Parameter templates that consist of settings that control how the device operates. Once a template is created, it cannot be edited. If settings must be changed you must edit the settings on a device and create a new template. You can delete an old template by clicking on Parameter Templates in the navigation bar.
Create a template
When creating a parameter template, the general process is described below, with a video of the process at the end:
- Edit an individual device. Setup the parameters as you require them on a single device
- Create a parameter template based on this single device. This will create a snap shot of its settings
- Apply the template to multiple devices to replicate those settings to all of the devices.
First step is to set up the individual parameters on the first device, you can see this process above in the main OEM Getting started article body.
Then select your device, and go to 'Parameters' (1) and click 'Create Parameter Template (2) (single device)
You can select whether you wish to save the current device's System parameters or Admin parameters (1) then where you wish to save the template (2). This can be helpful if you have a) many templates or b) specific templates used only for one client group. Then you can name the template (3) and provide an adequate description (4) that helps you identify the template from a dropdown list.
Applying a Parameter Template
Once you have created a parameter template as above, you can select as many devices of the same type as you need and bulk apply the settings.
As before, go to Parameters (1) and select 'Apply Parameter Template (multiple devices) (2)
Then select which type of template you have; Admin or System (1) and select the specific template from the dropdown list.
Video of Creating and Applying a Parameter Template
Setting a Batch String
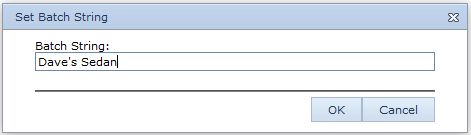
Setting a batch string is a handy way to notate individual or multiple units to identify them. Simply select the unit in the device grid(1) then go to Device Operations(2) and click Set Batch String(3)

Once you've entered your description, click OK
Assign Devices to Groups
Device groups are used to organize devices on the OEM Server:
- The hierarchy is Distributor -> Vendor -> Client
- This typically equates to Distributor (Digital Matter Branch) -> Vendor (Reseller) -> Client (end user or organisation)
- Users can only see the devices assigned to their group.
- New groups can not be created at this time, this can only be done by the admins at DM.
- Client groups can be created by users with the "Client Creator" permisison.
- If a device serial can not be found it might be in the wrong group. Contact Digital Matter for assistance.
To Move a Device into a different group, select a device and open Device Operations then click 'Set Device Group'
- You can then select the Distributor and Vendor organisations (usually only one) and a client organisation to move the device to.
- Here you can also create a new Client group to allocate devices to.
Can't Get Connected?