Getting Started - Inviting Users
Table of Contents
How to Set up a User in Telematics Guru
Navigate to Admin >> Users in Telematic Guru and select 'Invite User'

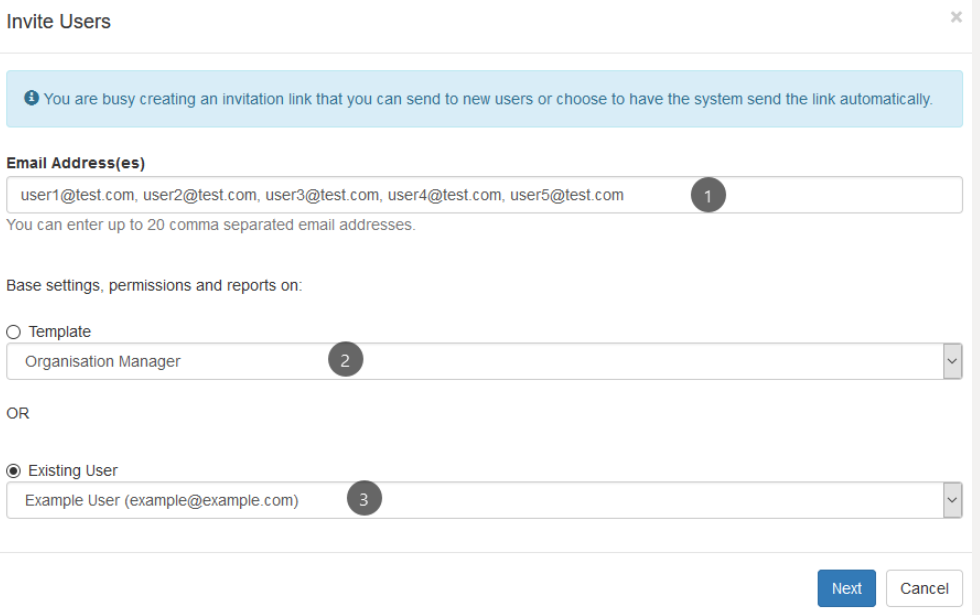
You will be presented with a dialogue:

- Email addresses of users to invite - you can invite up to 20 at once
- Base their permissions, report access and asset access on a pre-built template (these are templates loaded in the system)
- Or base it on an existing user account. The list here will be:
- All users in your home organisation (where your account is created)
- All users in the current organisation.
This makes it easy to quickly copy permissions from another user account in the current organisation. It is likely many users will need the same set of permissions. You can tweak these all in the next steps, they just form the base.
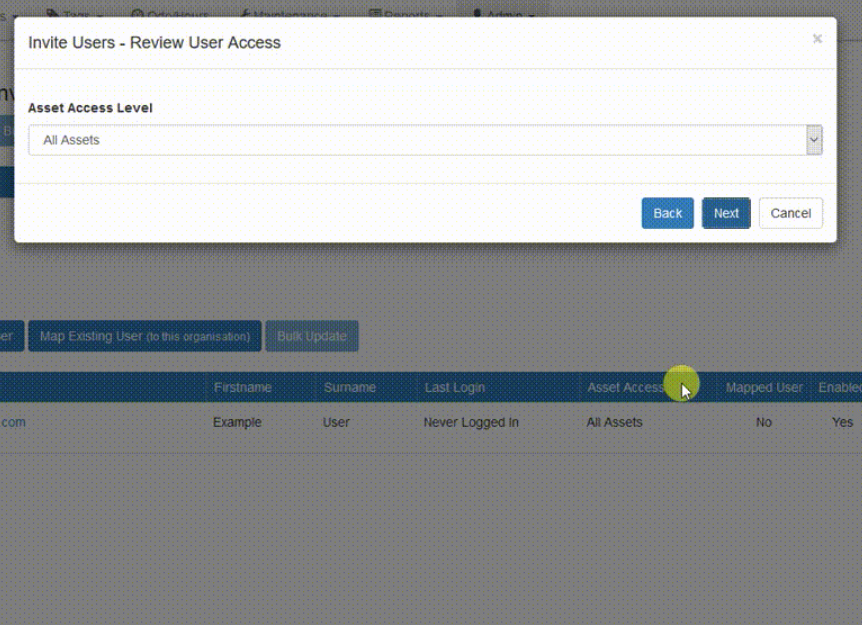
Click next and then you will be able to edit the asset access, permissions, and reports the user will have access to.

At the end of the process, there are two options. Send Invite, and Create Invite.
-
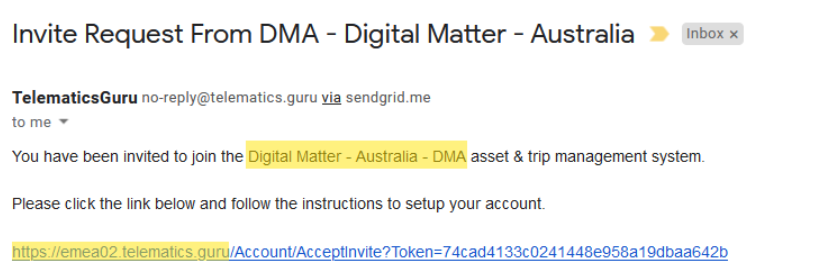
Send Invite will send an email invite via Telematics Guru's emailing system i.e. it will appear in the users inbox as coming from the same email address they get reports from. The organisation name and white-label URL will be filled in.

White label features
The invite email, and email domain can easily be white labelled. Have the emails come from @yourcompany, and customise the welcome text.
See Telematics Guru White Labelling
-
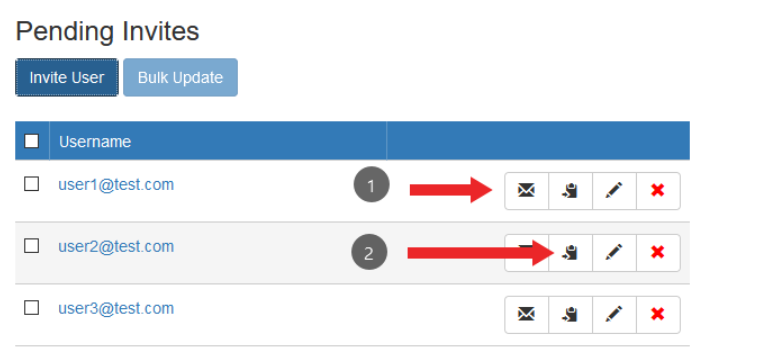
Create Invite closes the dialogue, and all users just created now appear in the Pending Invitelist

(1) will send them an invite email via TG
(2) copies the invite link to the clipboard - so you can send it in your own welcome email.
Once a user accesses the link - they will be prompted to set their timezone, name, preferred units as well as create a password.
In addition to the invite functionAdditionally there is a Create User button available. This has a couple of drawbacks:
- It is arguably not all that secure to be setting user password and emailing them to the user, who is likely to not change it, compromising account security
- The ability to copy permissions is not available
However once a user is invited - their account can easily be edited and password reset if need be.
About User Accounts
User "Home" Organisation
When you create a user, they are created in whichever organisation you are currently logged into. Once created, this becomes their 'home' organisation. A user accounts' permissions and report access can only be edited from this organisation.
A user can be 'mapped' to another organisation, so that they can view some or all of the assets in these other organisations. But their permissions and report access can only be set once, in their home org.
Asset Access
Users can have their asset access limited to:
- All Assets
- Specific, selected assets
- A specific project (note an asset may change projects meaning therefore the specific asset access changes)
The User Support and Support User features
These permissions are very useful for admin/support/operations staff. Read more about it here: User Support Permissions
