Asset State Configuration
Table of Contents
Asset State Configurations can be used to have assets change colours in the Live View and Trip History view according to different digital input combinations or "states". State changes will also be recorded in the asset timeline/event log, and the Asset State - Detail and Asset State - Summary reports.
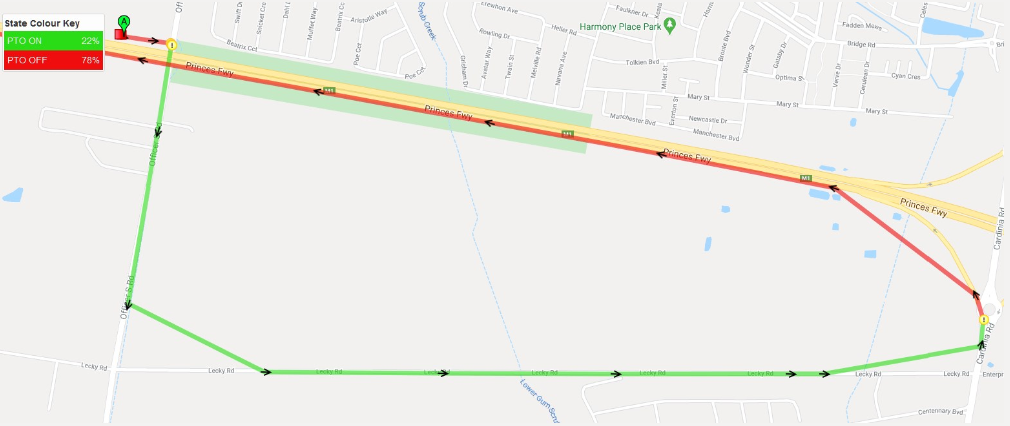
Simple example with PTO mapped below.
For example, consider the Ignition Input and a Digital Input (e.g. pump, motor, safety switch). You could assign different colours to the following combination of states. So then we would be able to see at a glance which of our assets currently have their pump on or off.
| State Name | Colour if conditions TRUE | Ignition (Digital Input 0) |
Pump (Digital Input 1) |
|---|---|---|---|
| Pump & Engine OFF | OFF | OFF | |
| Only Engine ON | ON | OFF | |
| Only Pump ON | OFF | ON | |
| Both Engine & Pump ON | ON | ON |
We will follow through the process to set up asset states:
Setting Digital Inputs in OEMServer
Digital InputsPlease read the article regarding setting up a Digital Input on a device |
Enabling Functionality in TG
First make sure the organisation you are setting up Asset States in has the functionality enabled. This is in Admin > Organisation > Functionality and is called "Asset State".
For the user account that you wish to configure the Asset state you'll need the 'Asset State Configuration Manager' permission under Admin Manager subsection in User Permissions. To view the Asset state trips you only need to permissions to see those views, i.e. Live tracking, History view etc.
Telematics Guru Set up
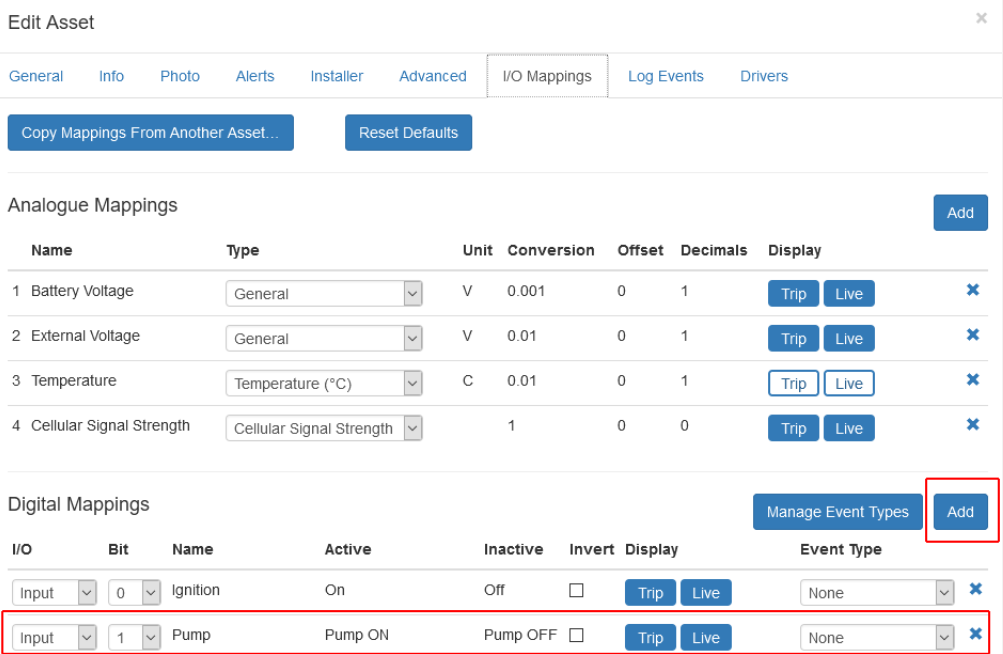
For each asset you'll need to open Assets > Manage Assets > Edit > I/O Mappings and add in the Digital Input. You can name the input, and set the active/inactive state names and also select whether to display it on the Trip/Live views. You can also edit the created Digital inputs direct from the list as below.
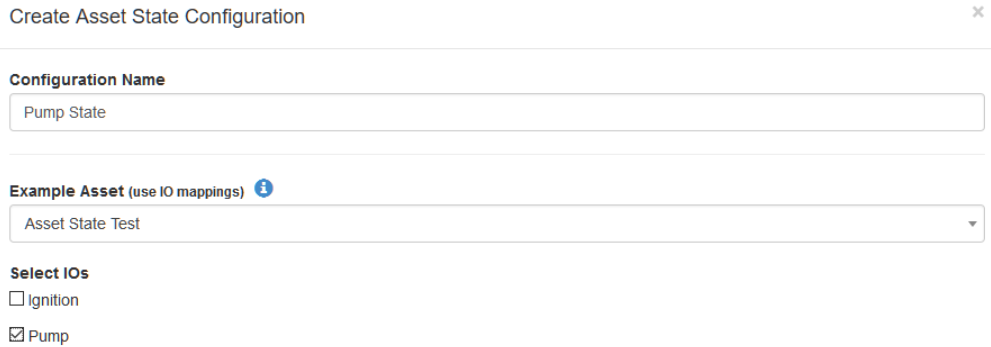
To create a new Asset State, Go to Admin -> Asset State Configuration -> New

Here you can Name the asset State, and select the Asset to apply the state to. This will display the asset's Input/outputs that are set up. Select the I/Os you wish to apply the state to.
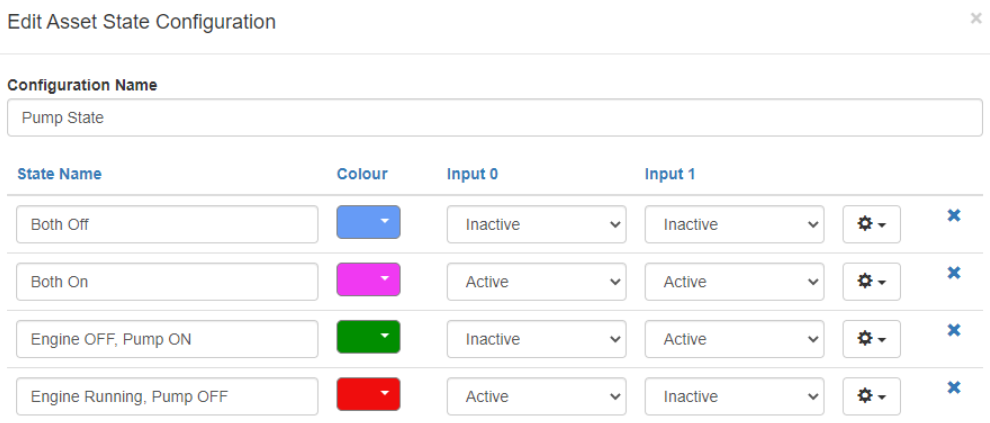
Select what conditions will display what colour, in this example it is undesirable to have the pump running without the engine running, so we have the four possible configurable states that cover off all scenarios. Once you've set up the states, click Next.
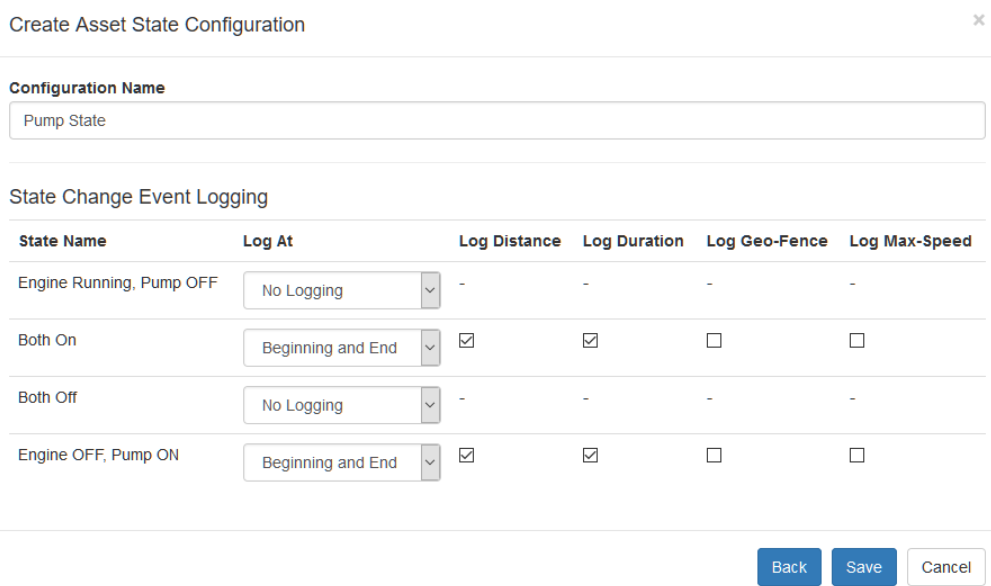
Select whether you want to activate logging on each state. This will determine what appears in your reports. For example we want to know how long the pump is running, in both engine off and engine on states. Click save
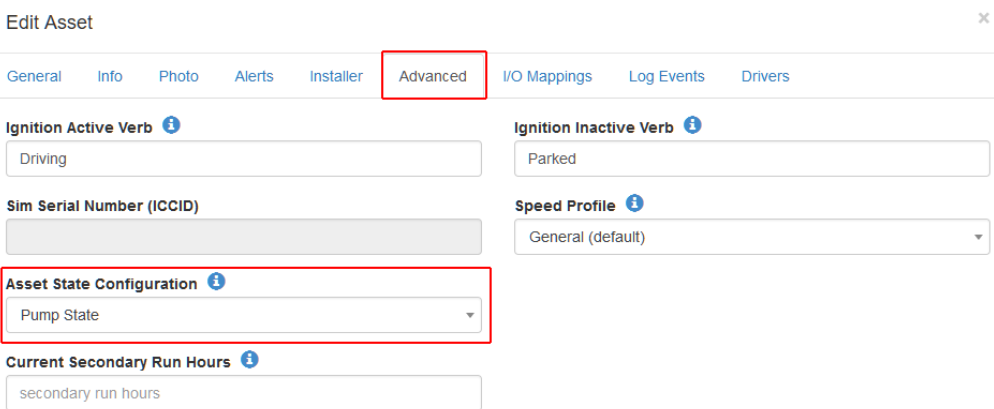
You can now apply the asset state to each Asset. In Assets > Manage Assets > Edit > Advanced, edit each asset to use the created configuration.
Switch to Asset State view in the live viewer to view the assets with their asset state colours. You can also set up Alerts to notify you when a digital input is active or inactive depending on your use case.

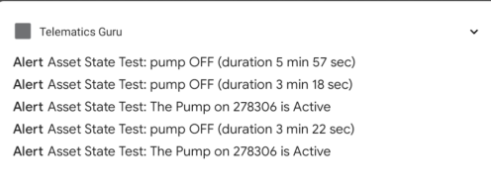
Using an alert to report on duration of Pump Digital Input being ON you can also use the Telematics Guru app to receive push notifications.
These settings will be able to generate a map such as the below example:
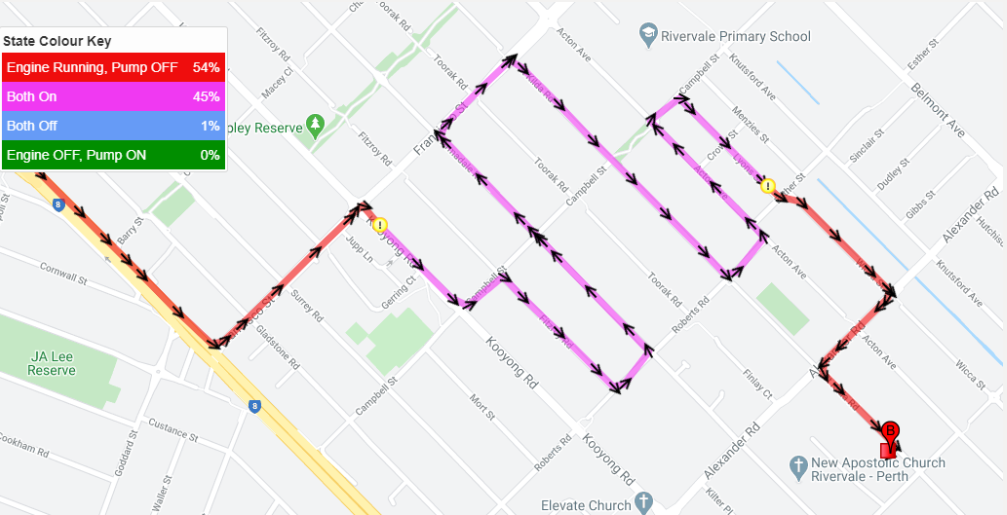
If you have assets in different states, they appear like this on the live view.
