How to Use the Installer Page
A Dedicated Page for Non Users to Check Device Status
Table of Contents
Devices using Direct Integration mode.
This installer page is not useful/suitable for devices using the Direct integration mode - as no device data passes through our servers. Using this page can be misleading as fields like 'Last GPS update' will not be current/updated.
This Article refers to the https://devicemanager.digitalmatter.com/installer webpage.
The Installer Page is not password protected - so installers without Device Manager (or Telematics Guru/other platform) access can do a quick device check during/after an installation. Checking the following key indicators:
- Connectivity - Device can connect OK and is online
- GPS - is the device able to get a fix?
- External power wiring - it is powered correctly and reporting this to server?
- Ignition/IO wiring - test if the ignition and digital inputs come on/off in response to changes in input - i.e. they're wired and configured properly.
Typical Installer Check Procedure
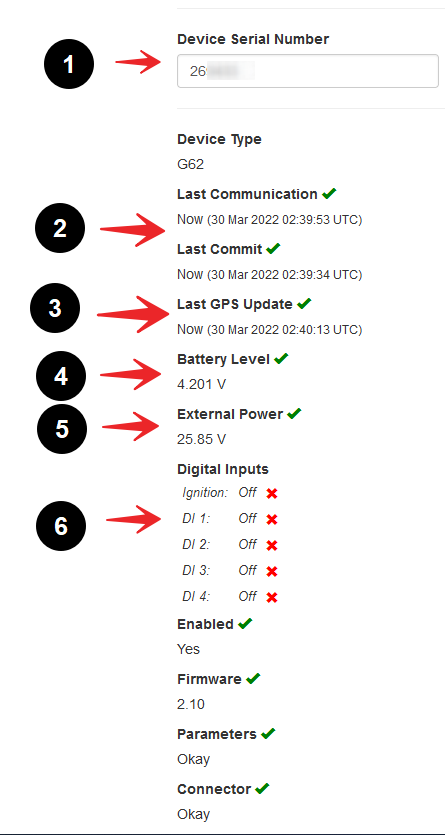
- Enter your serial number (ensure it is correct)
- Does Last Communication and Last Commit say 'Now'?
Only move onto step 3 if both answers are yes - as otherwise, the data following is out of date.
- Is the last GPS fix recent? To trigger a fix apply >5V to the white ignition line.
- Is Battery Level OK? (Internal LiPo batteries are 4.2V when fully charged, 3.7V when flat)
- Is External Power at expected level? Most devices need at least 9V reliably
If you have a 12V supply, should be 12V etc
- Can you achieve both Ignition On & Off by toggling wire?
This will require a refresh of the page to see change
When the ignition is toggled to OFF - does the External power still remain at the right level? (This checks we haven't wired to a power source that shuts off when the ignition is off)
Do any Digital Inputs (DI 1 etc) need to be activated?- Toggle the inputs and check what is displayed on the installer (on or off) matches what is physically happening.
- If the behaviour is inverted (reads on when it should say off and vice versa) - this may potentially be a configuration issue which can easily be corrected server side by flipping the active level.
- Toggle the inputs and check what is displayed on the installer (on or off) matches what is physically happening.
Add the Installer Page to your Device's Home-screen
You can bookmark (iOS) the Installer page on your mobile device or save it on your home screen (Android) for easy access
iOS (Apple iPhones)
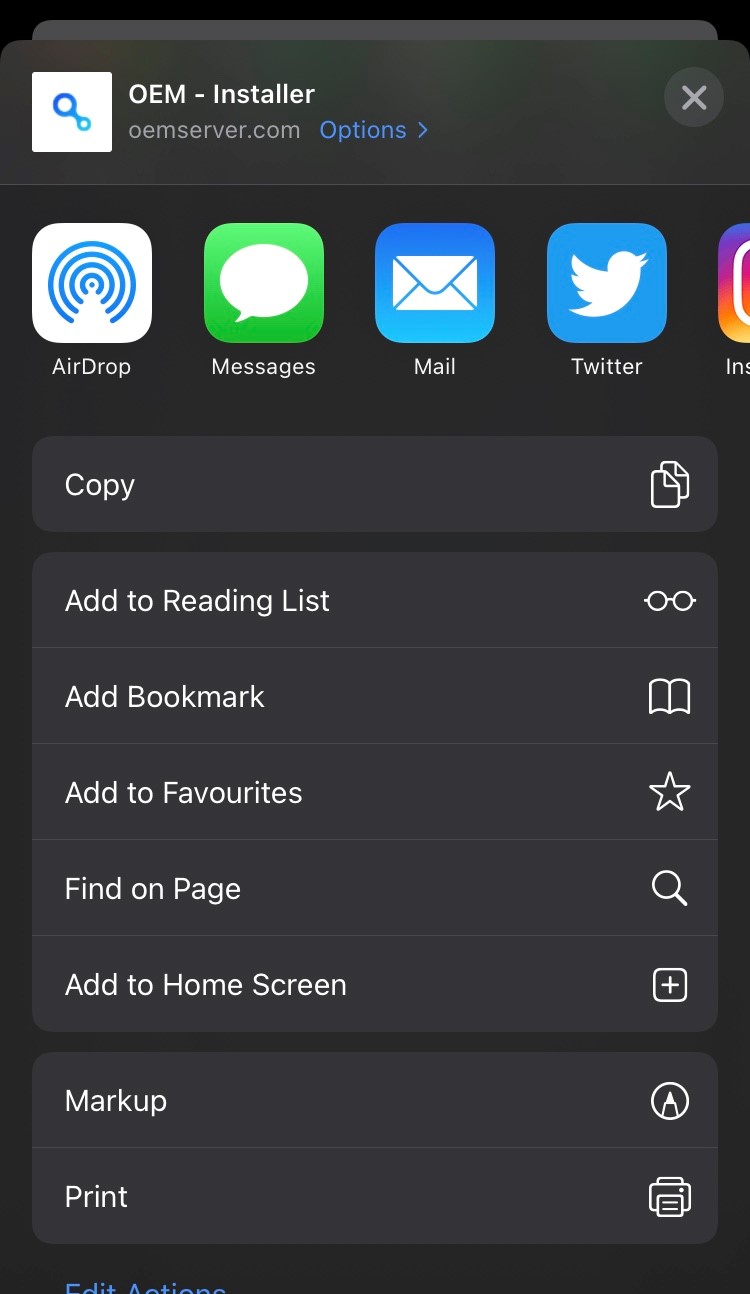
To add the installer bookmark to your home screen, open up https://devicemanager.digitalmatter.com/installer in Safari and tap the share arrow. Then find the Add Bookmark button and tap it.
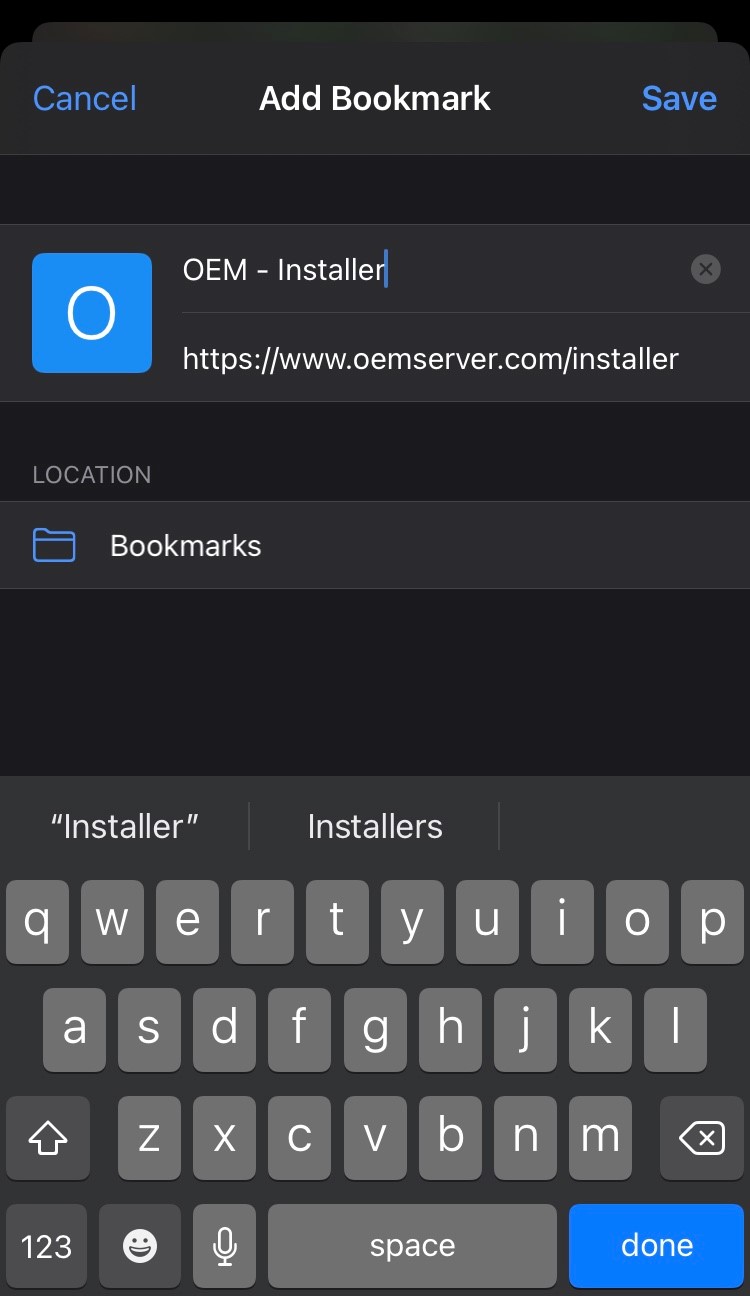
You’ll see the following screen, where you can edit the name of the bookmark (it is best to leave it as OEM - Installer). Tap Save to add it.
 |
 |
Android
- Open Chrome browser (usually your default Google search) and type www.devicemanager.digitalmatter.com/installer
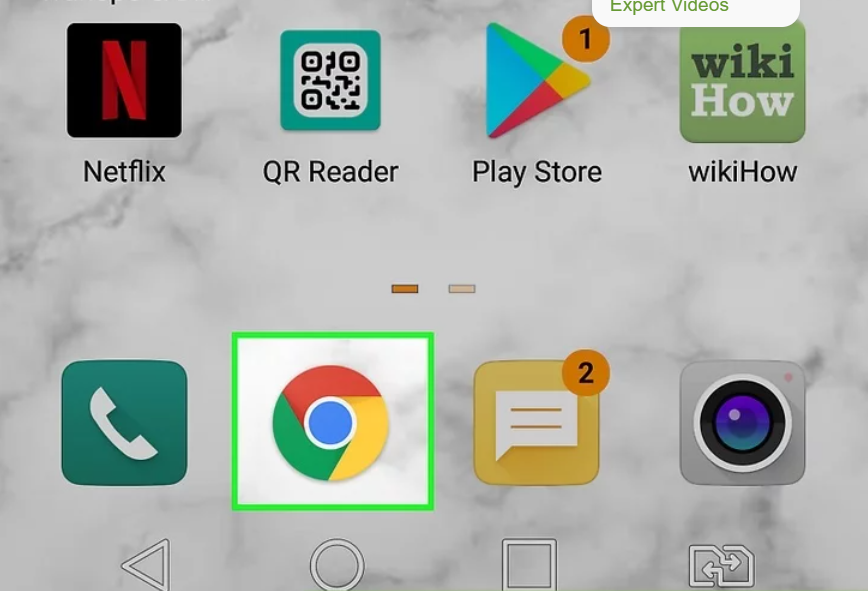
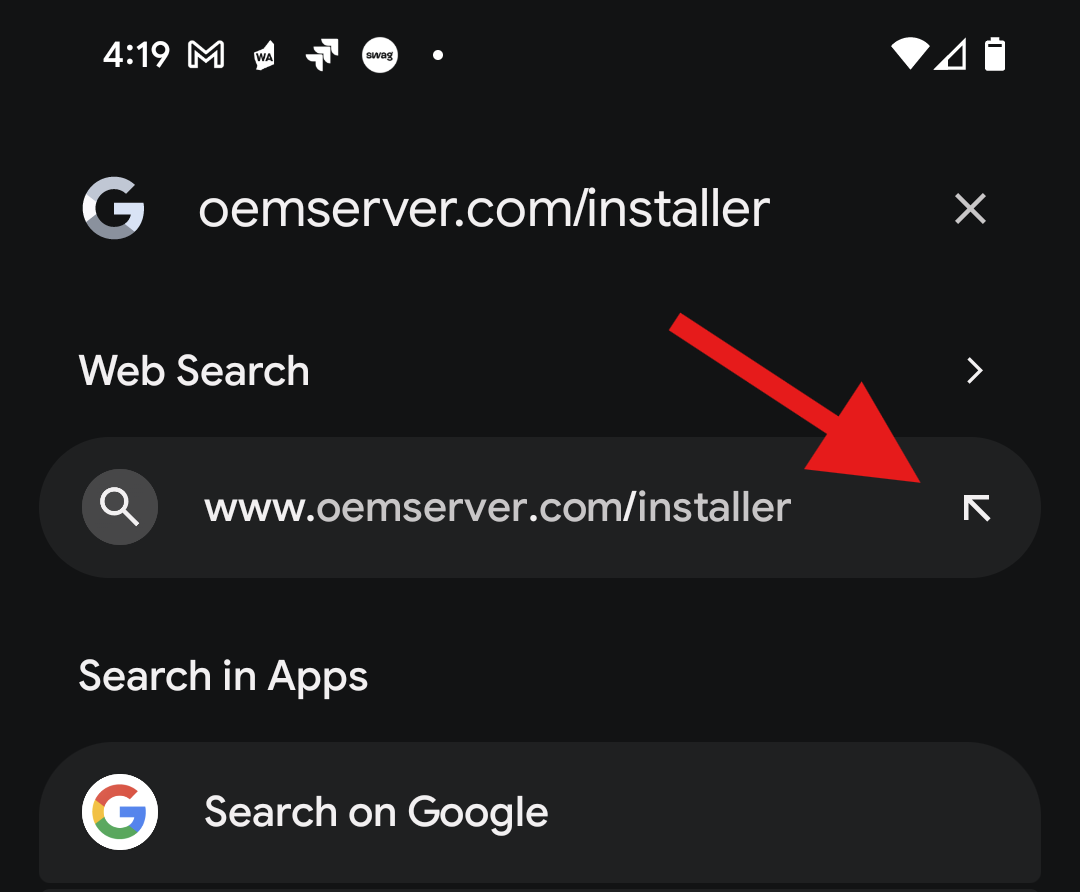
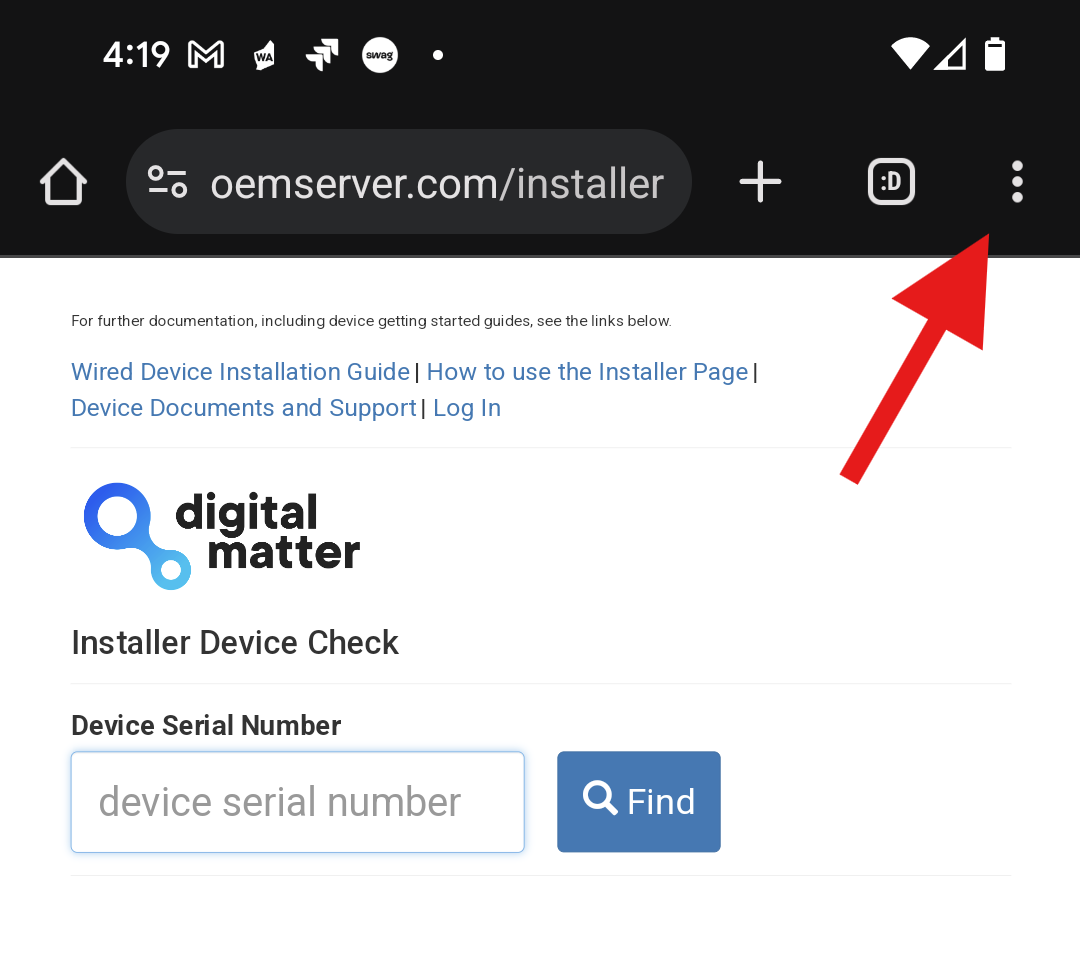
- Tap the 3 dot menu ⋮. It's at the top-right corner of Chrome.
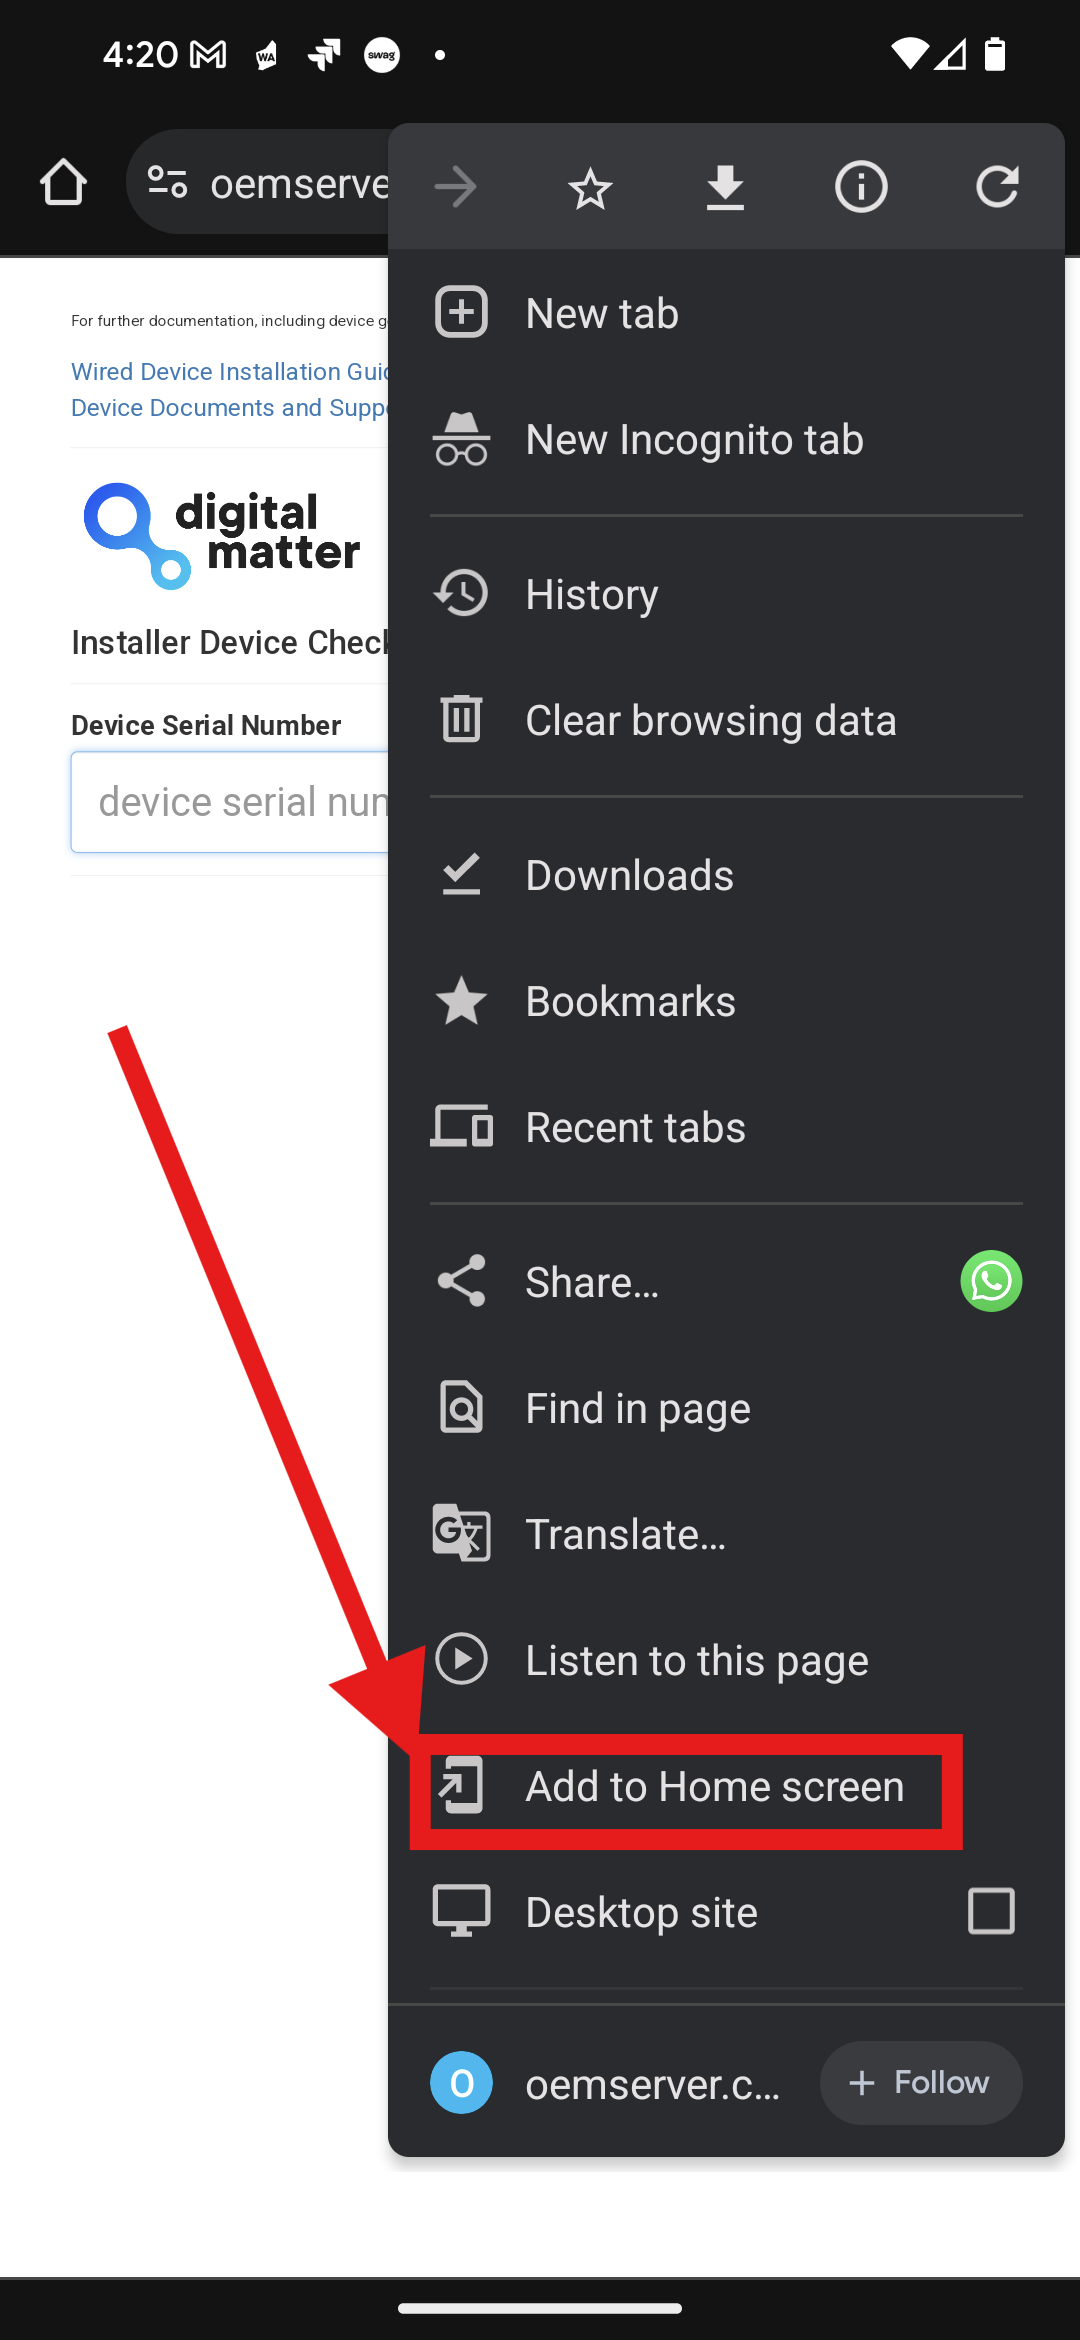
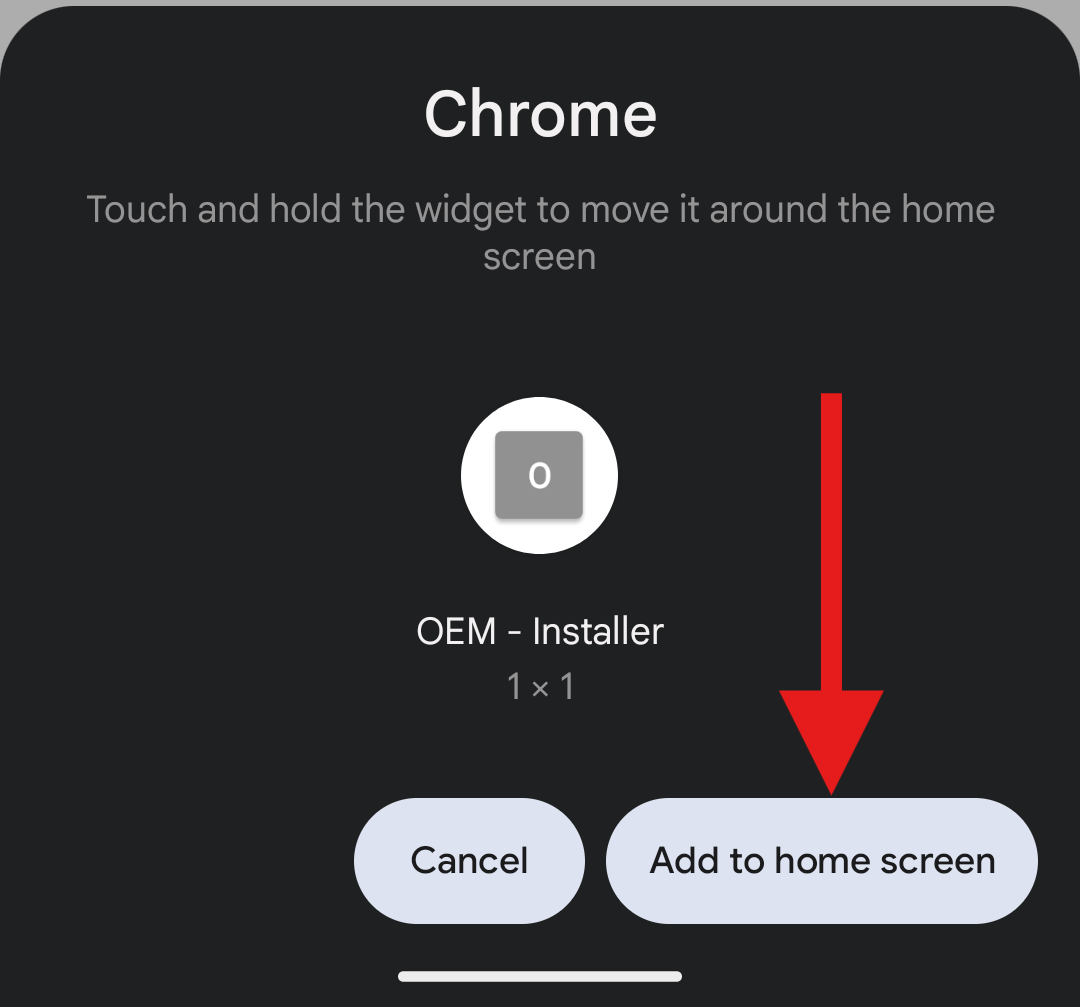
- Tap Add to Home Screen which is located near the bottom of the popup menu (you may have to scroll down to see it).
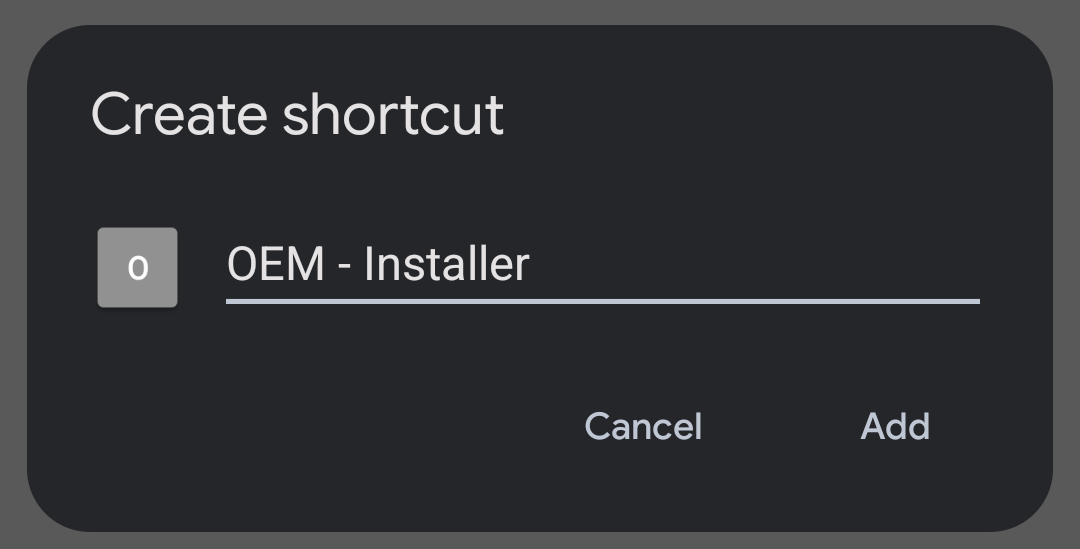
- The Create Shortcut popup window will prepopulate the name as 'OEM - Installer' but you can edit the name for clarity.
- Depending on your phone model, you may receive additional prompts about where to place the shortcut on your home screen. For devices running the latest versions of Android it will appear as follows.
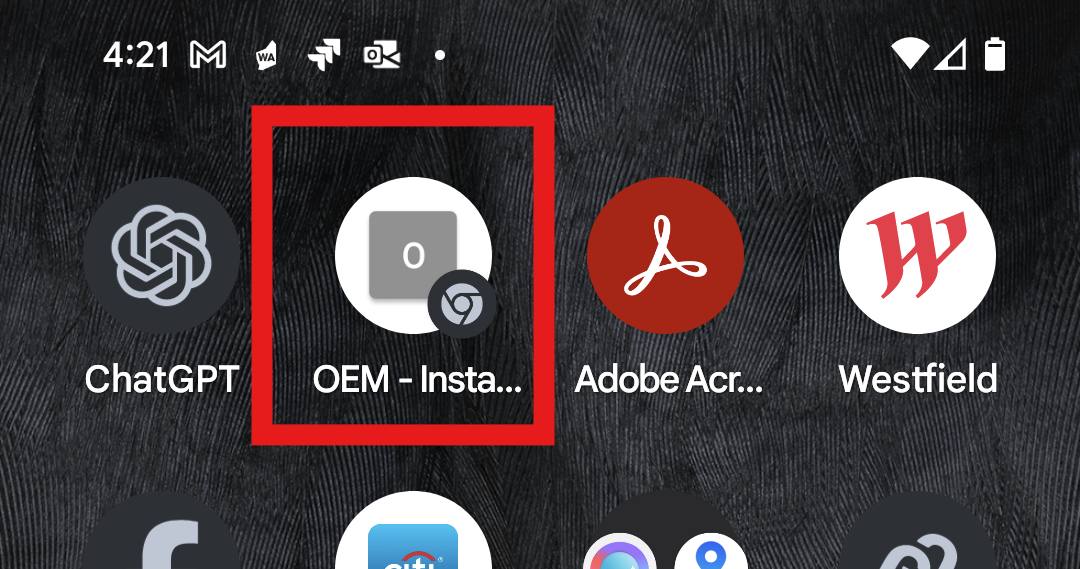
- Review your home screen, it should look something like this:
Embedding Serial Numbers in the Installer Page URL
Partners can create OEM Installer links for specific devices by creating URLs using this format:www.devicemanager.digitalmatter.com/installer?sn={your six digit serial number goes here}
for example: www.devicemanager.digitalmatter.com/installer?sn=123456
Instead of searching for each serial manually, you can link to specific URLs created like this on dashboards/reports to access the relevant devices quickly.