Initial Provisioning - Yabby Edge LoRaWAN®

Written by Matthew Clark-Massera
Updated at February 3rd, 2023
Table of Contents
In the Box
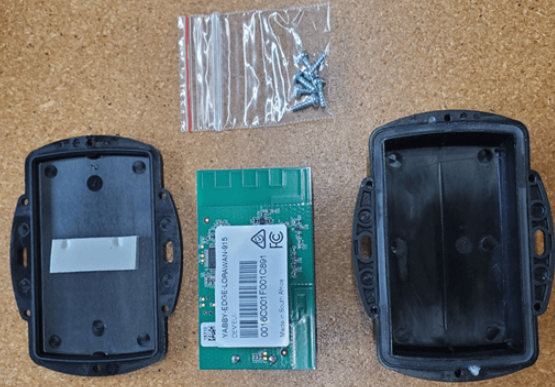
You'll get a compact box containing the Yabby Edge LoRaWAN + standard housing. The 6 housing screws will be in a small packet inside the housing.
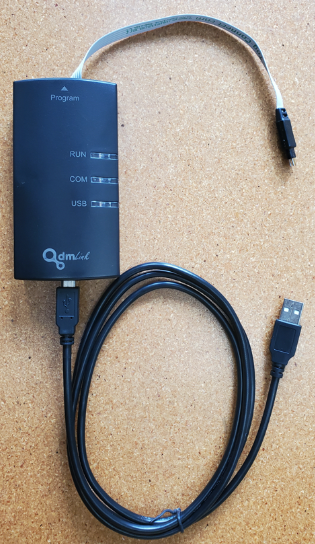
DMLink Cable and App
For provisioning, a DMLink cable is required:
A Windows provisioning app is used and can be downloaded here: https://www.oemserver.com/tools/LoRaWANProvisioningTool/setup.exe
Provisioning Process
1. Install the App
Follow the prompts and the app will walk you through the process
2. Configure your LoRaWAN region
How other parameters, features and settings are configured is described in detail here - Yabby Edge LoRaWAN® - Configuration and Usage Guide. However to simply get online, on default settings, we only need to configure the LoRaWAN region - other parameters can be left as default.
The default JoinEUI is 70-B3-D5-70-50-00-00-09. You may need to configure your JoinEUI specific to your application - but often it makes sense to use the default on your application so no special provisioning is required.
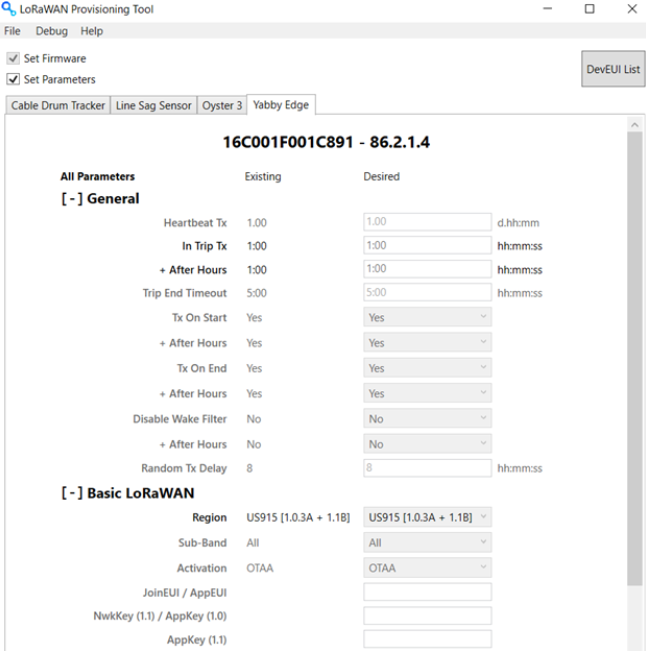
- Open the App
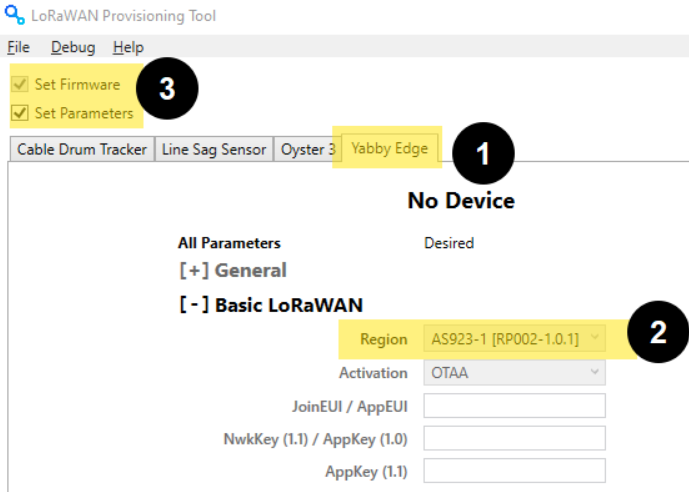
- Select "Yabby Edge"
- Select your LoRaWAN region and sub band if applicable (in this example AS923-1)
- Tick Set Firmware and Set Parameters
- Ticking "Set Firmware" will load the latest firmware onto the device - which is worth doing - though it will take longer to load than only parameters - which will be of impact if you are provisioning many devices.
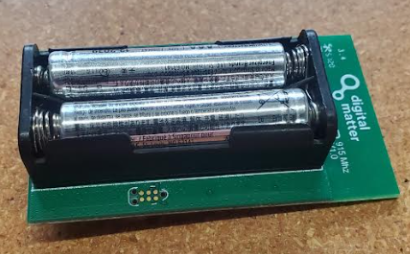
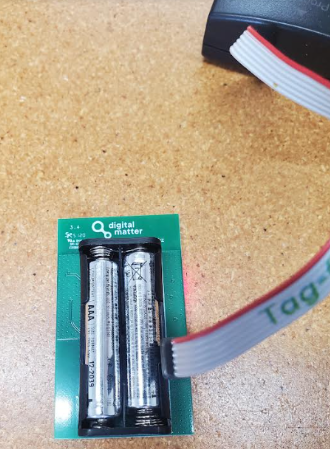
3. Insert Batteries
- The device must be powered by batteries prior to connecting the provisioning tool
- 2 x AAA Lithium Batteries are required
- Energizer Ultimate Lithium (L92) are recommended
- Alkaline batteries can be used - but you will likely only see 50% the battery life of Lithiums - plus many models are of poor quality and prone to early failure. However if you just want to quickly provision a device, or change some settings - they are acceptable for this purpose.
-
Take care to ensure the polarity is correct, there is no reverse polarity protection
4. Plug in Tool
Plug the tool into the 6-pin connector near the battery holder.
The tool will play a sound once the firmware/parameter update is complete. You will see the 'desired' column how has the loaded parameters
6. Configure the device on your Network Server
This is specific to the network server you are on. See guides here: Yabby Edge LoRaWAN - Integration
7. Seal the Device
- Ensure the silicone seal is free of any dirt, is in good condition, and is laying flat in the housing groove
- Gently press the base and lid together
- Tighten screws evenly - there should be about a 1mm gap between the base and lid all around the housing once complete.