Remora2 - Getting Started
Table of Contents
The Remora, redesigned and supercharged!
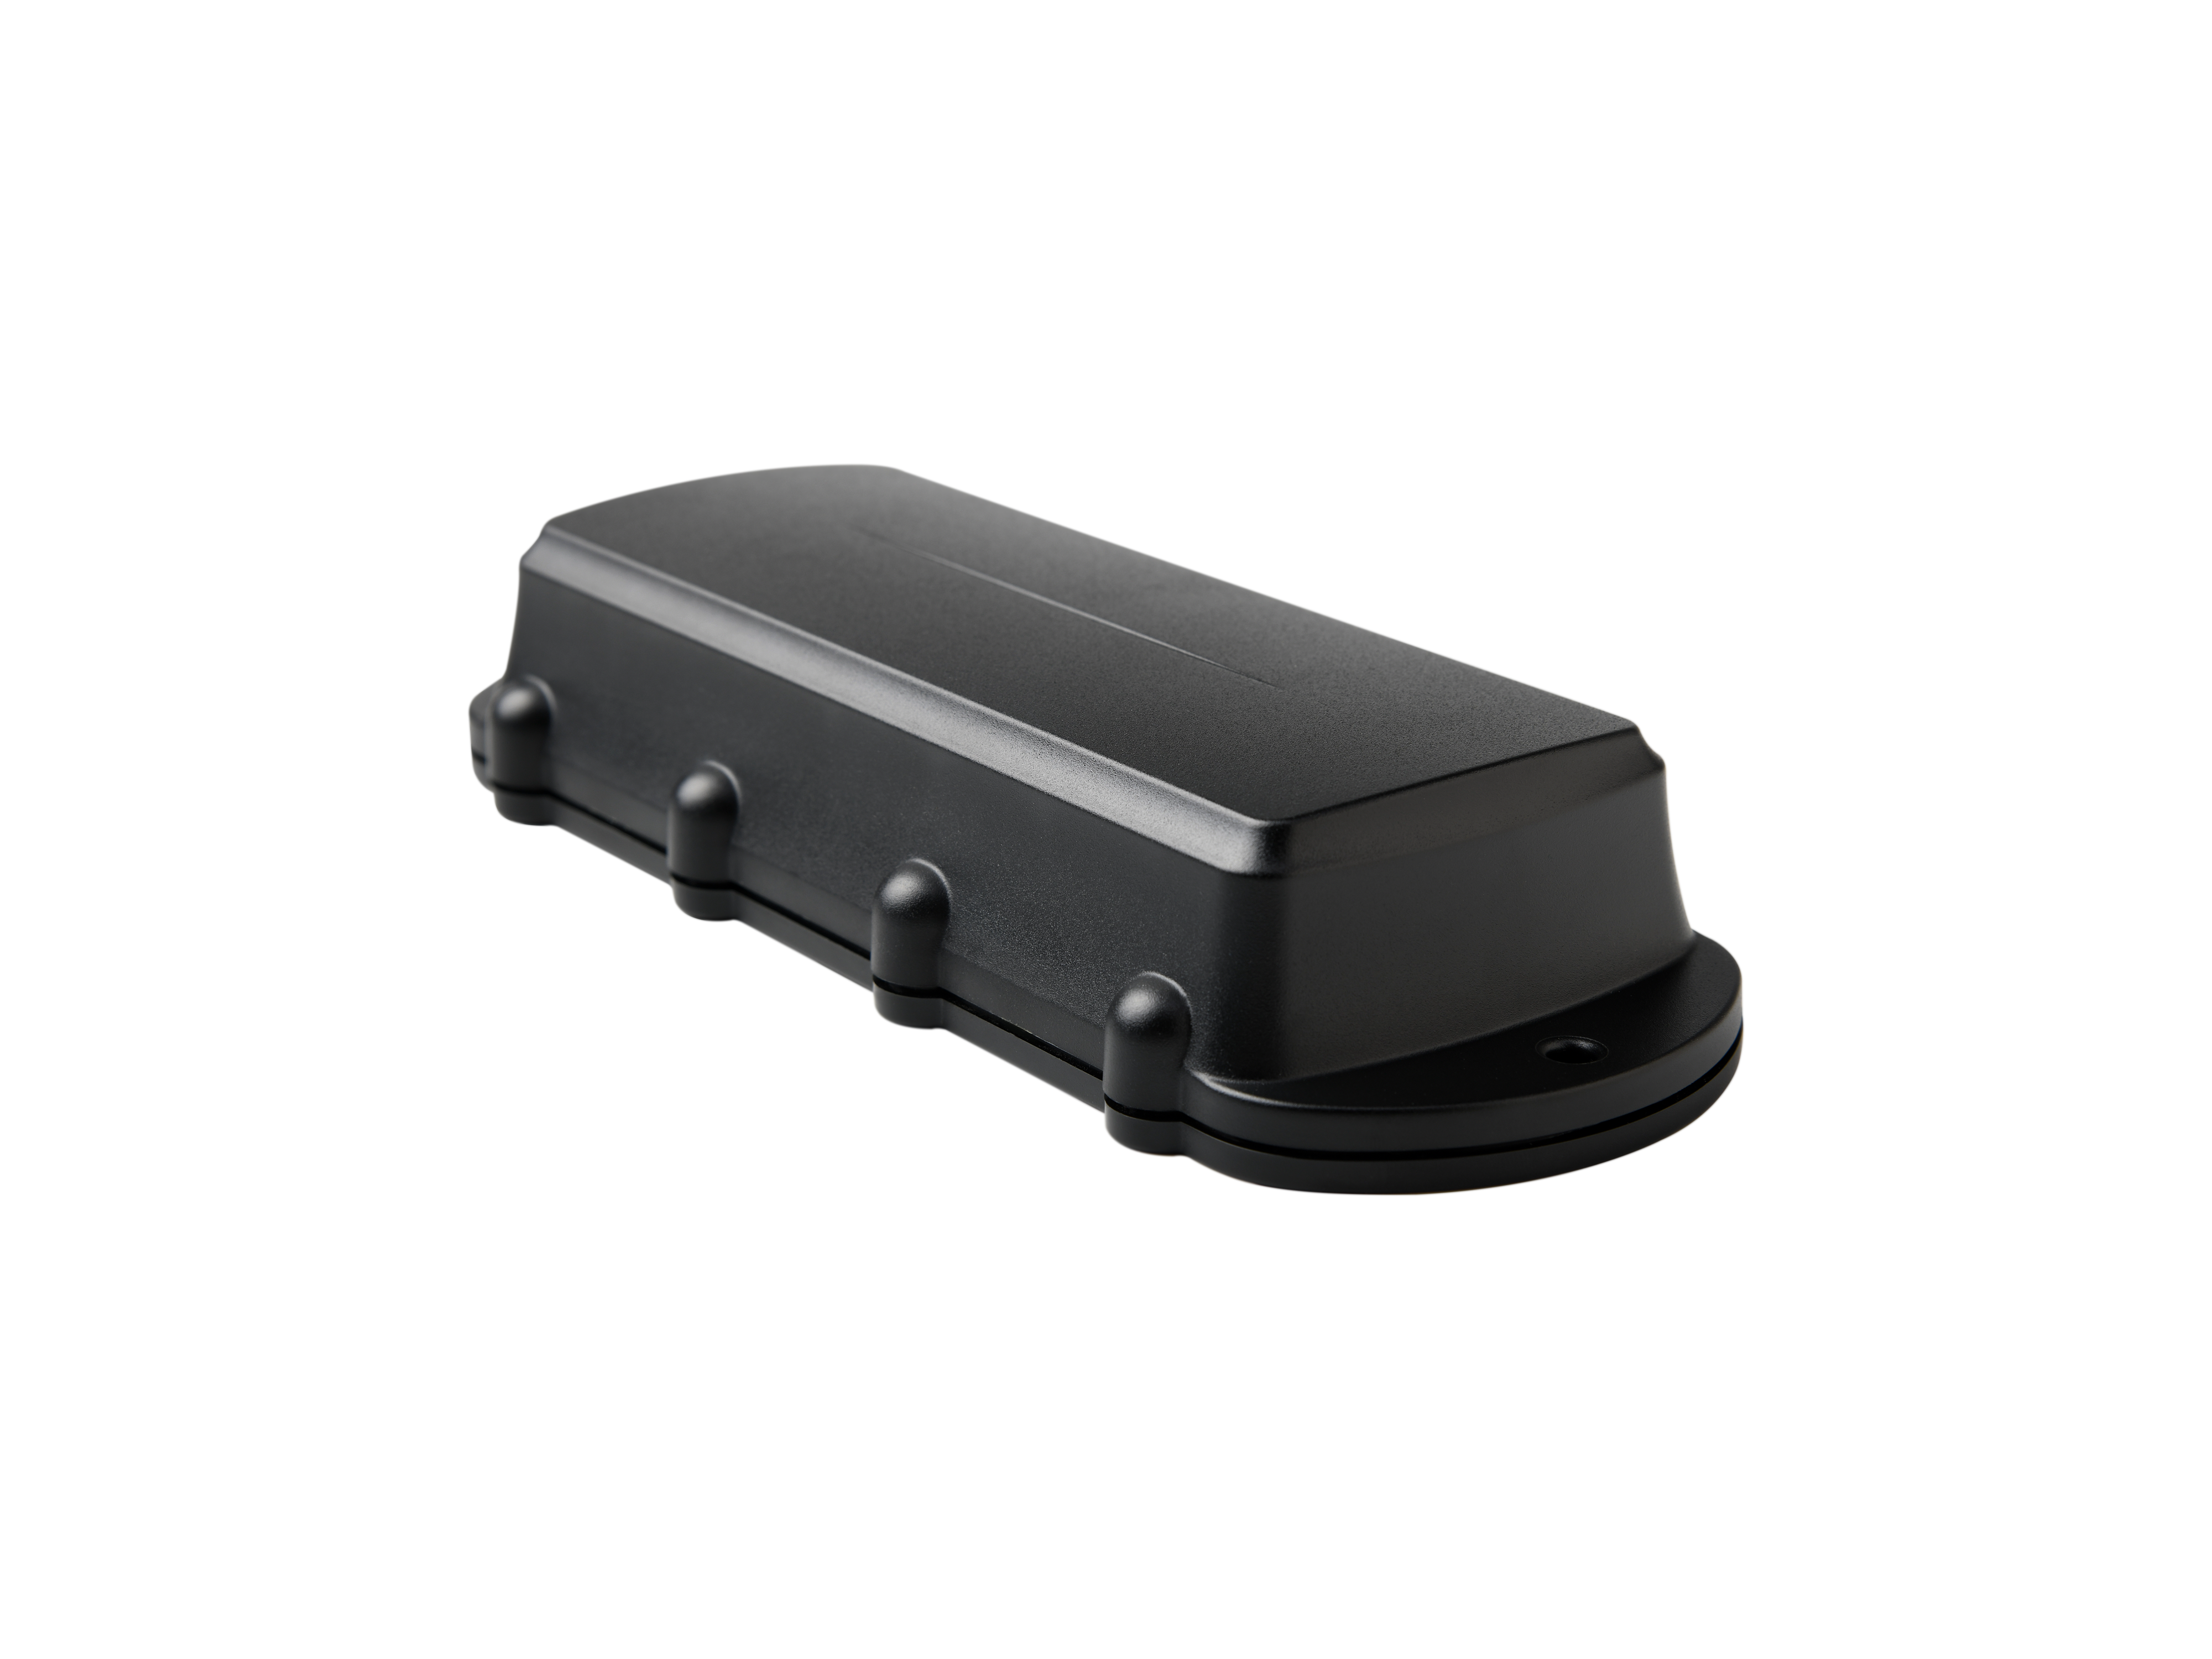
The Remora2 is an IP67 rated, rugged 4G Cat-M1/Nb-IoT GPS device designed for tracking non-powered assets where super-long battery life is required without sacrificing the frequency of updates and accuracy performance.
digitalmatter.com
See the product page on our website for more specifications.
Datasheet & High Resolution Images
Remora2 Downloads
View the latest tech-specs and high resolution device images for the Remora2
This article will help you get up and running to test the Remora2.
In The Box
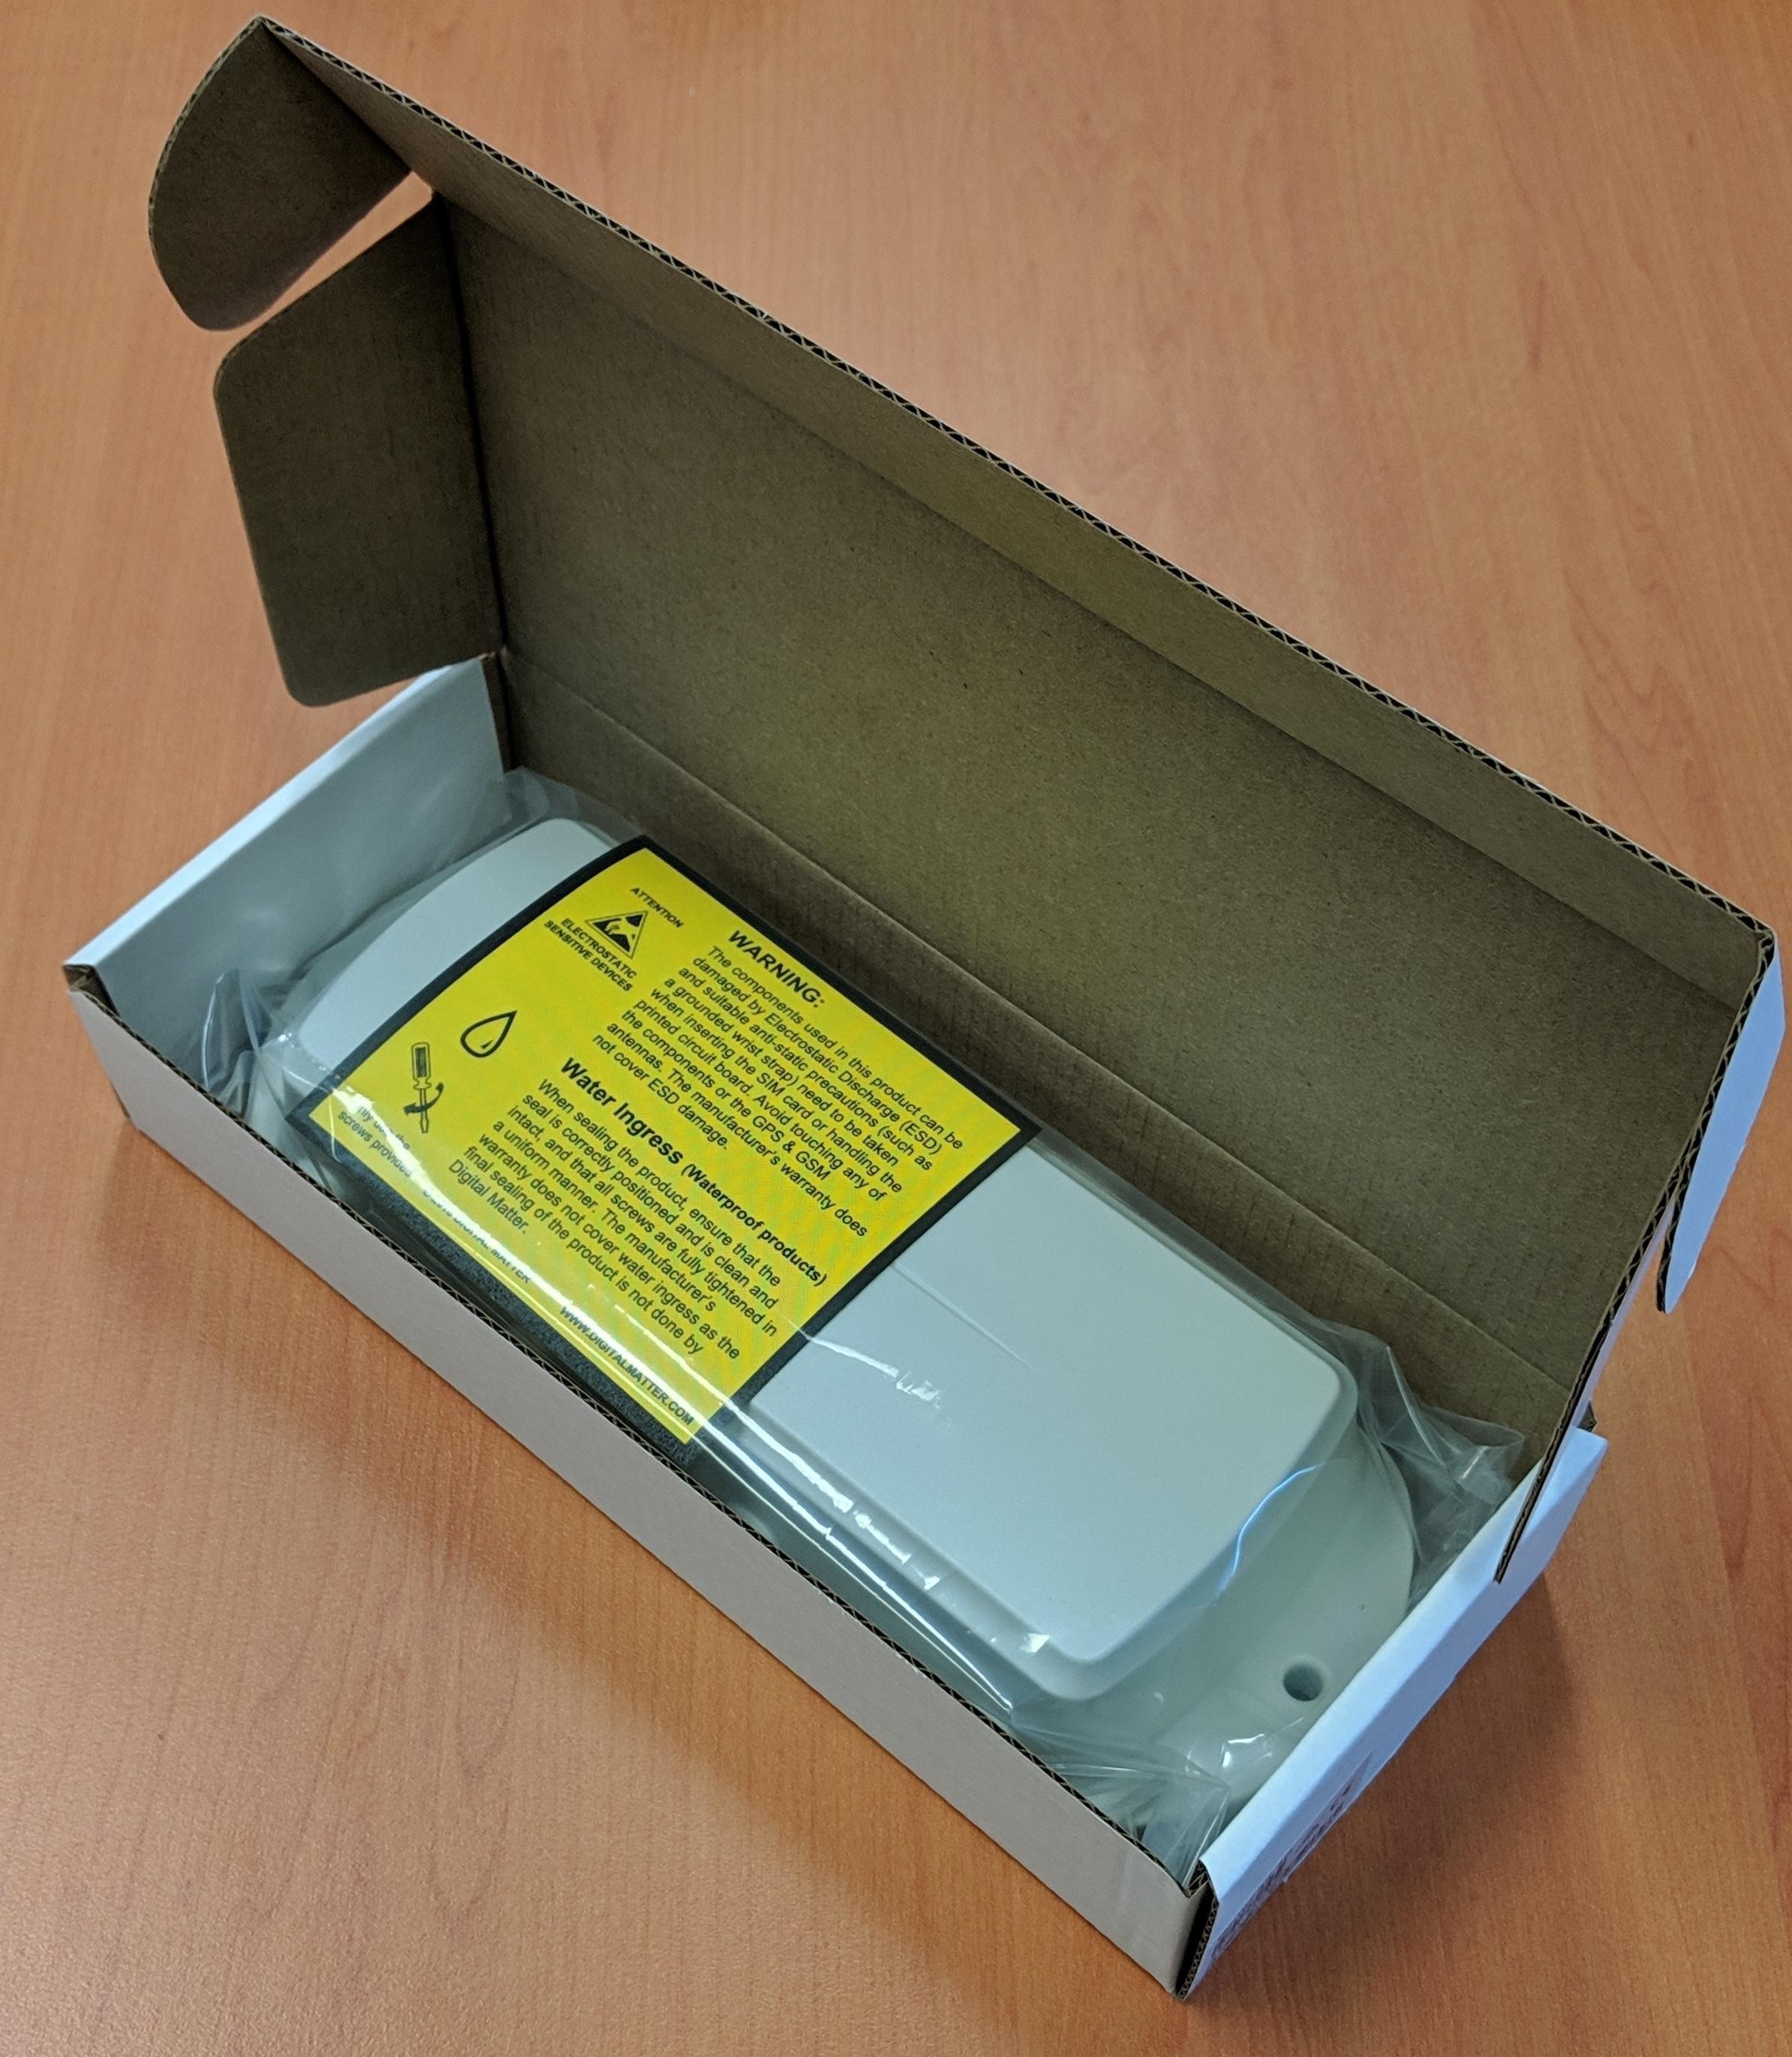
You'll get a compact box containing the Remora2. The 10 housing screws will be in a small packet inside the housing.
Setting It Up
SIM Card
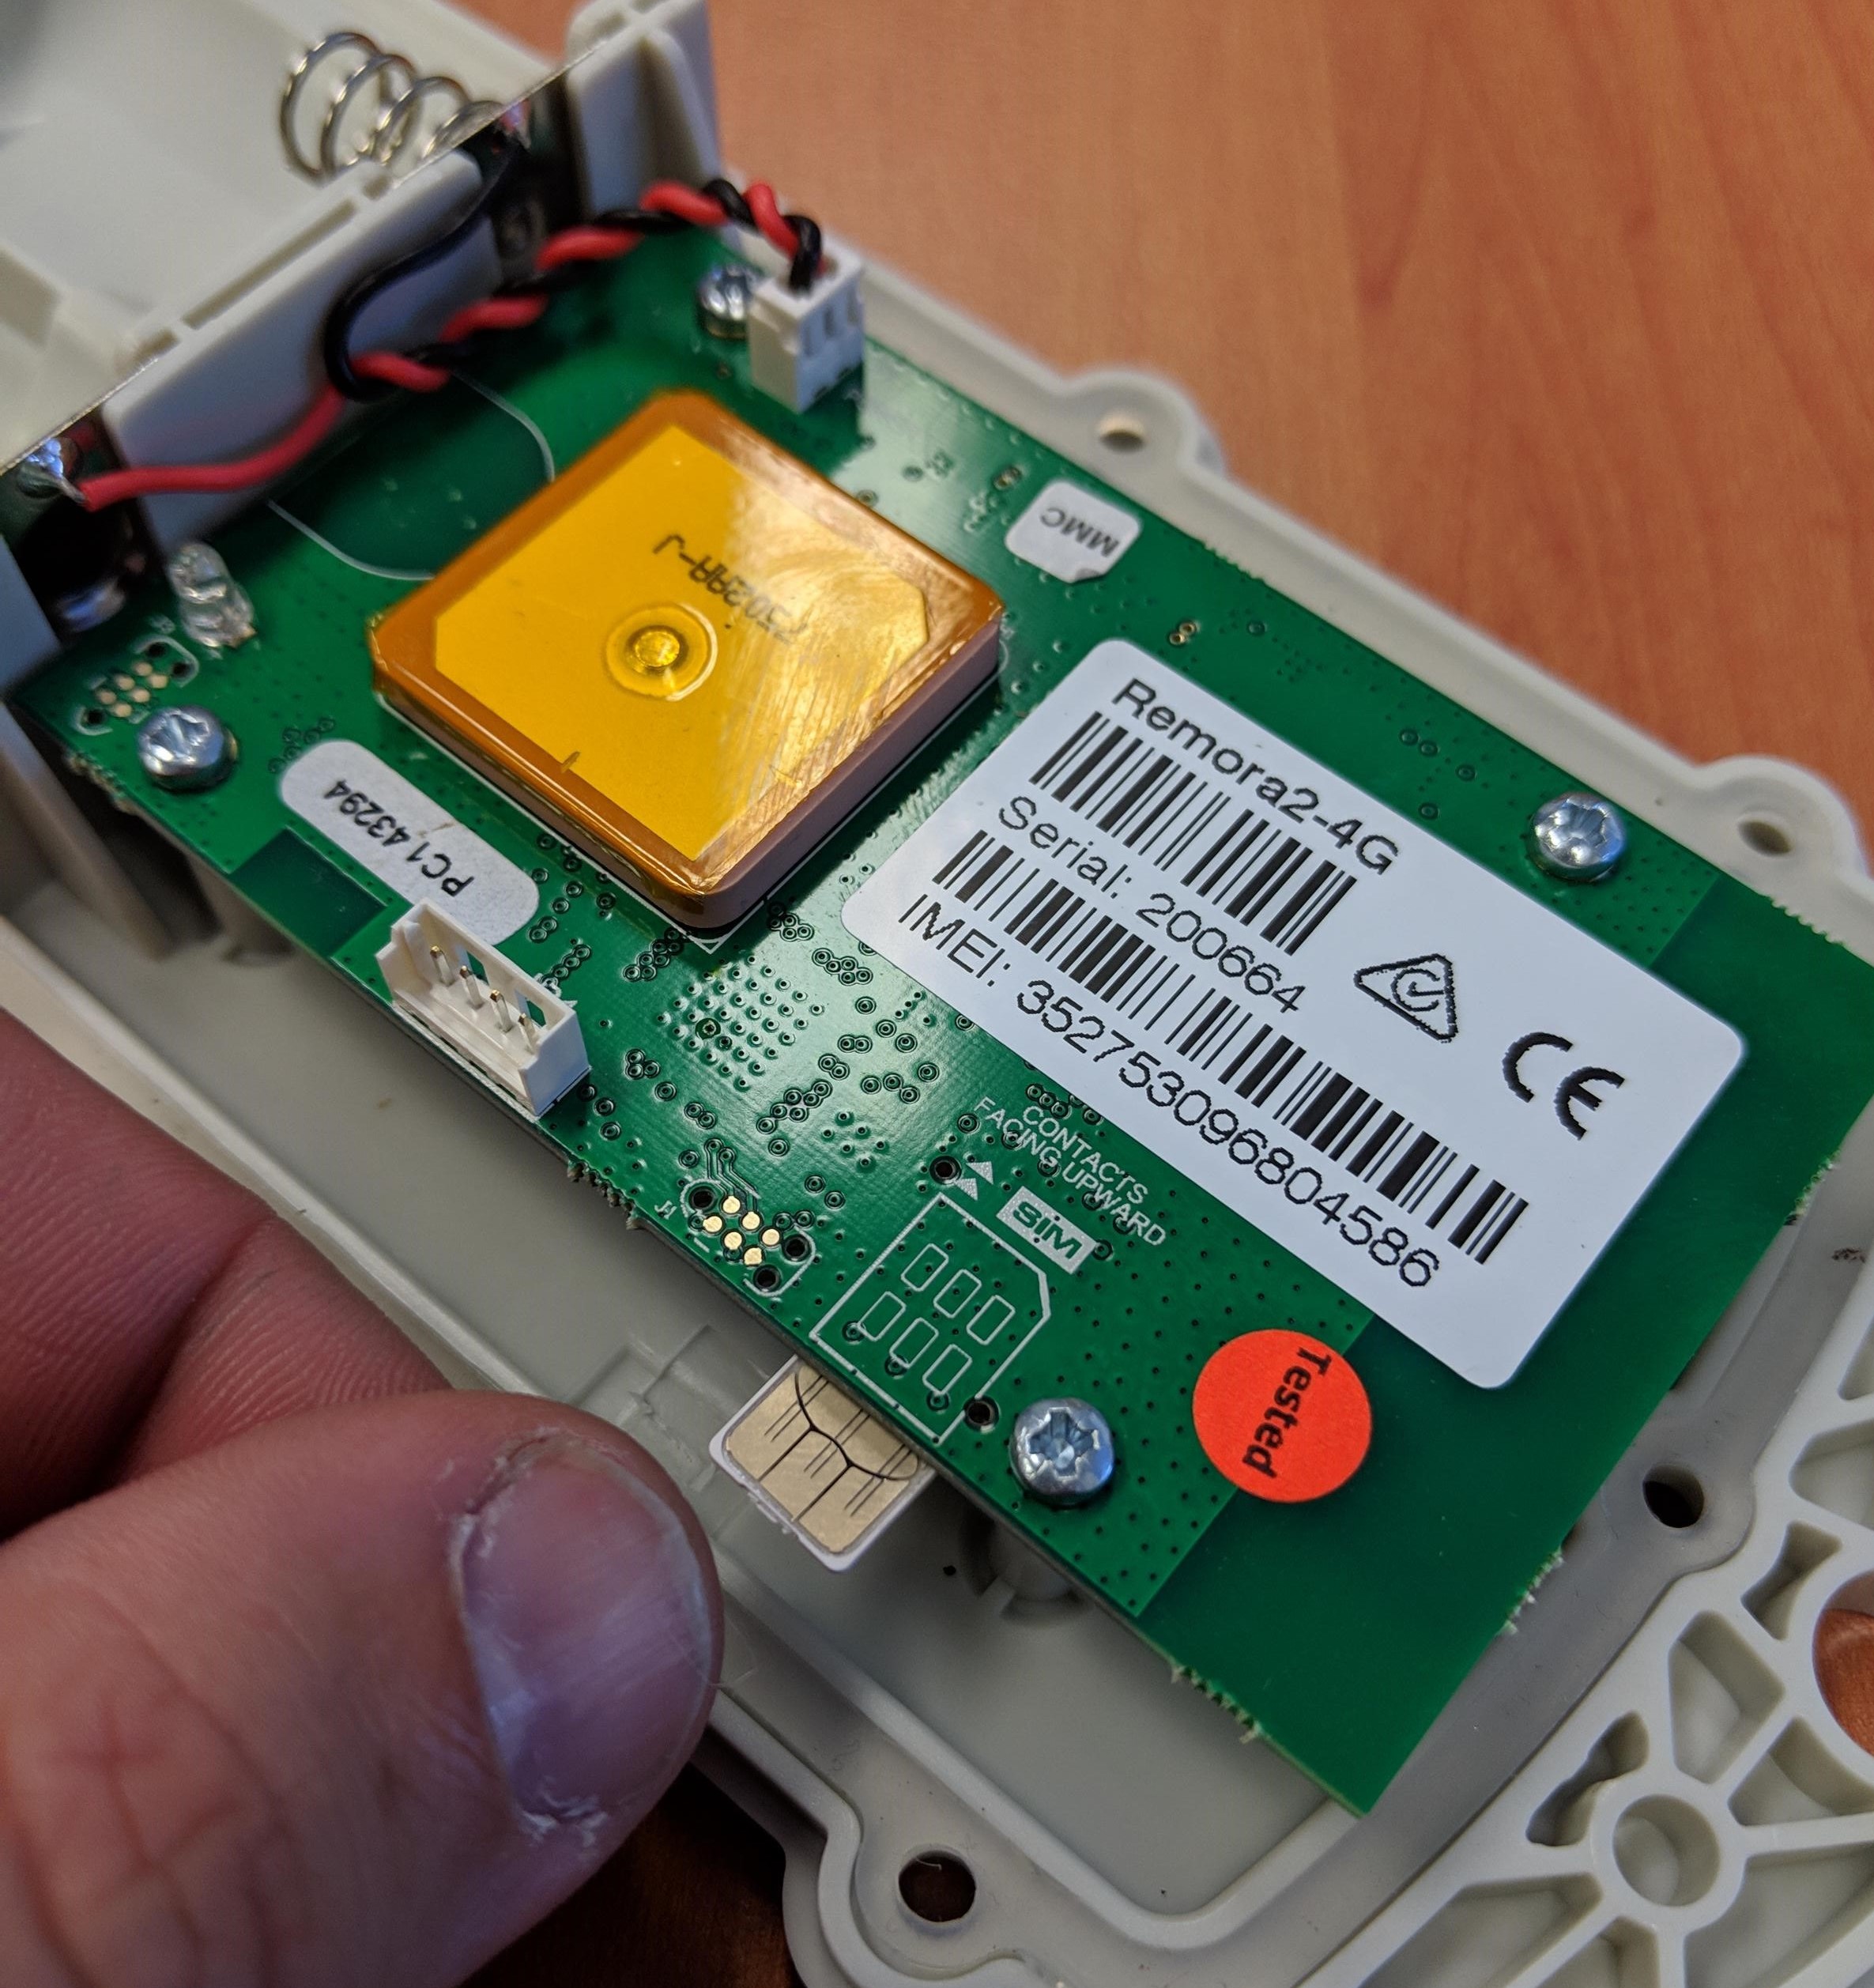
The Remora2 takes a 4FF, Nano SIM card. The SIM holder is on the underside of the main board, next to the riser furthest away from the batteries. When handling the Remora2 be careful not to touch the GPS antenna, to minimise the risk of damaging the sensitive GPS amplifiers with static discharge.
- Locate the sim holder by finding the picture on top of the PCB.
- The SIM should be inserted with the keyed corner on the inner side, and the contacts orientated up to the underside of the main board.
- Be sure to push the SIM card all the way in so the card is not poking out.
To easily get up and running:
- The SIM should not have a PIN on it, unless you use the device specific PIN.
- The SIM should have credit or airtime
- The SIM should use one of the APN's built into the firmware. Otherwise contact Digital Matter support about APN setup. It is possible to set APN's by SMS, for more information view the APN section on the knowledge base.
Batteries
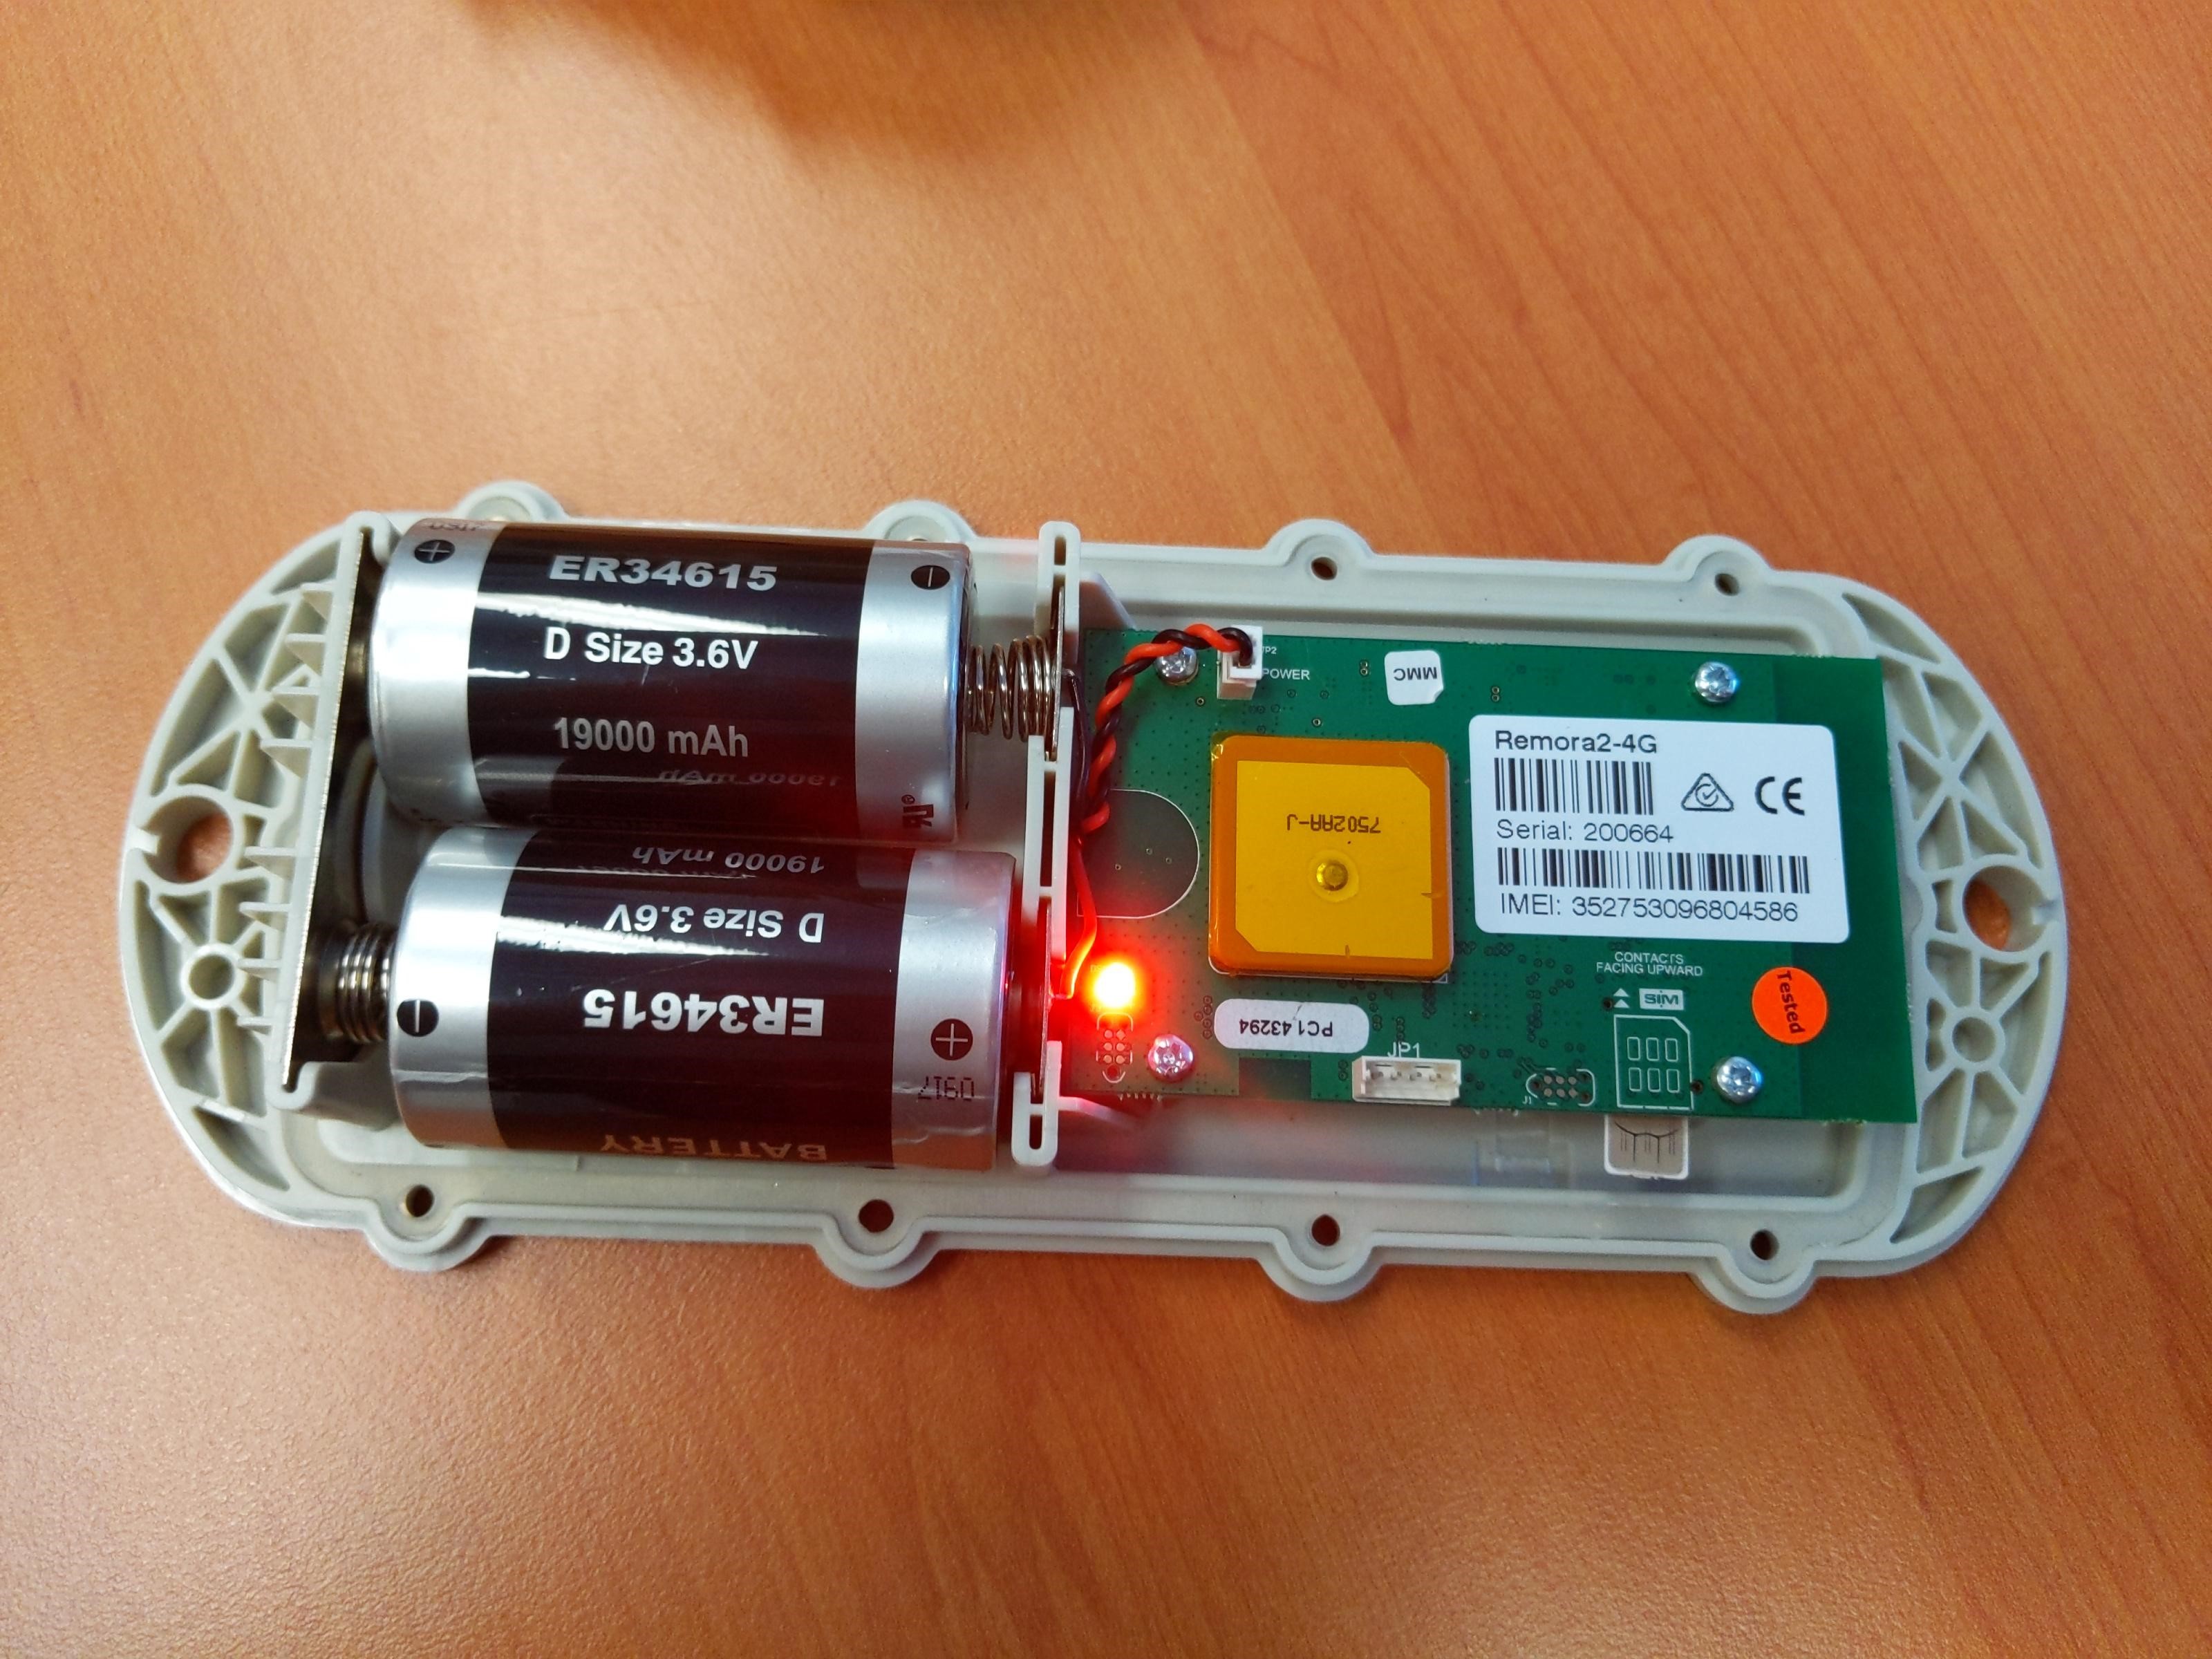
The Remora2 is powered by 2 x D Cell Lithium Thionyl Chloride (LTC) batteries for super long battery life. LTC batteries also offer continued operation in extreme temperatures.
Important!
It is important that you use the correct Battery type (i.e. Not Alkalines) and if using LTC batteries, that they can supply enough pulse current. Not all LTCs are built the same! For more information can view the Remora2 Battery recommendations page
Battery Management
The Remora2 is fitted with a coulomb counter, which tracks the energy used by the device. This reading and other useful statistics are exposed on the Battery Management page in Telematics Guru
Take care to insert the batteries with the correct polarity as the Remora2 does not have reverse polarity protection. The springs are the negative terminals.
Once inserted, the LED next to the GPS antenna should flash briefly. If it does not, it means the unit has not yet reset. In this case, remove the batteries for a minute or two to allow any residual charge to drain, and then reinsert them. Failure to reset the unit will prevent automatic APN detection, and proper resetting of the battery life statistics
Housing
Seal the device carefully to achieve the IP67 rating. Ensure that the clear silicon seal is in good condition, is lying flat, and is not fouled by any plastic swarf or by protruding connector cables.
- Place the lid on the base, and gently squeeze it shut. Foam in the lid will compress against the batteries, holding them firmly in place when the unit is turned over.
- Warning: Be sure to place the lid the correct way around. The foam should be over the batteries. Screwing the lid down the wrong way will damage the base.
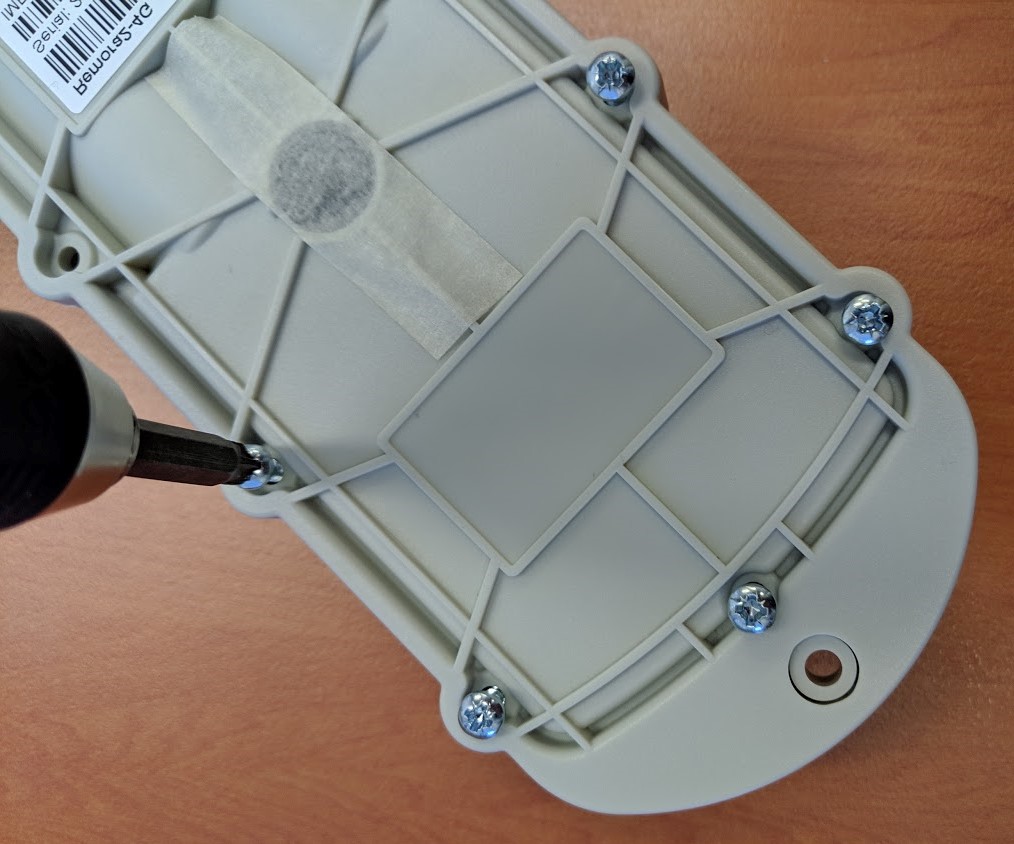
- Tighten the 10 screws to a uniform tightness. On the first assembly the screws may be quite stiff. An electric screwdriver with a torque limiting clutch is recommended.
- The screws used are a Zinc plated screw for use in thermoplastic: 3.5mm x 12mm (BN82428). If you're after a stainless steel variant, the product code is BN82429. be sure to also select the 3.5mm x 12mm version
- If you wish to replace the batteries and open the housing, be sure to check that the silicon seal is in good condition before closing the housing again.
Device installation
The Remora2 can be mounted on the asset to be tracked using screws, bolts, cable ties, or industrial adhesives. When choosing a mounting point, you have two competing goals:
- To minimise the chances of the device being accidentally crushed or dislodged.
- To maximise the GPS and mobile reception, and provide adequate ventilation.
Since the Remora2 is a battery powered device, reception is critical to its performance. While other members of the DM product family rely on their high quality GPS receivers for enhanced accuracy and the ability to operate in very low signal, the primary concern for the Remora2 is the battery used during each GPS fix.
It is important to choose a mounting point that will not result in elevated temperatures. For instance, mounting the Remora2 in direct sunlight on the dash of an unventilated cabin may lead to the batteries performing at less than peak, and can lead to an abnormally short service life.
Getting Online
Once the batteries are inserted, the internal LED will come on and flash. If the SIM card works, the device will connect to the OEM Server. You can go to www.oemserver.com/installer and search for the serial number to confirm that it has connected recently.
The LED will flash slowly at first. When it opens a connection to the server, it will flash fast. Once data is sent, it will go solid briefly, and revert to flashing fast. When the device goes to sleep, the LED will switch off.
If the LED flashes but the Remora2 does not connect, check the SIM is in the holder correctly and check that the SIM is working.
Remember
Make sure once you're online, to declare your APN in the Admin parameters to ensure if you lose the network connection the device knows where to re-connect, and doesnt take time and battery life scanning through all known frequencies
APN AutoNet
For more information on Declaring APNs and the 4G AutoNet, see our knowledge base article here
Troubleshooting Steps
See here for tips for if your device isn't connecting
Default Input/Output Mappings
The Remora2 Default Input Mappings are listed below.
Digital Data will be sent to the end platform in Field ID 2 (Digital Data) and Analogue Data in Field type 6 and Field Type 7
Contact DM Support for integration documents.
| Digital Input # | Name |
|---|---|
| 0 | Ignition |
| 1 | Battery Good Digital Input |
| 2 | Tamper Detect |
| b0 Status Flags | Trip Status |
| b1 Status Flags | Battery Good Flag |
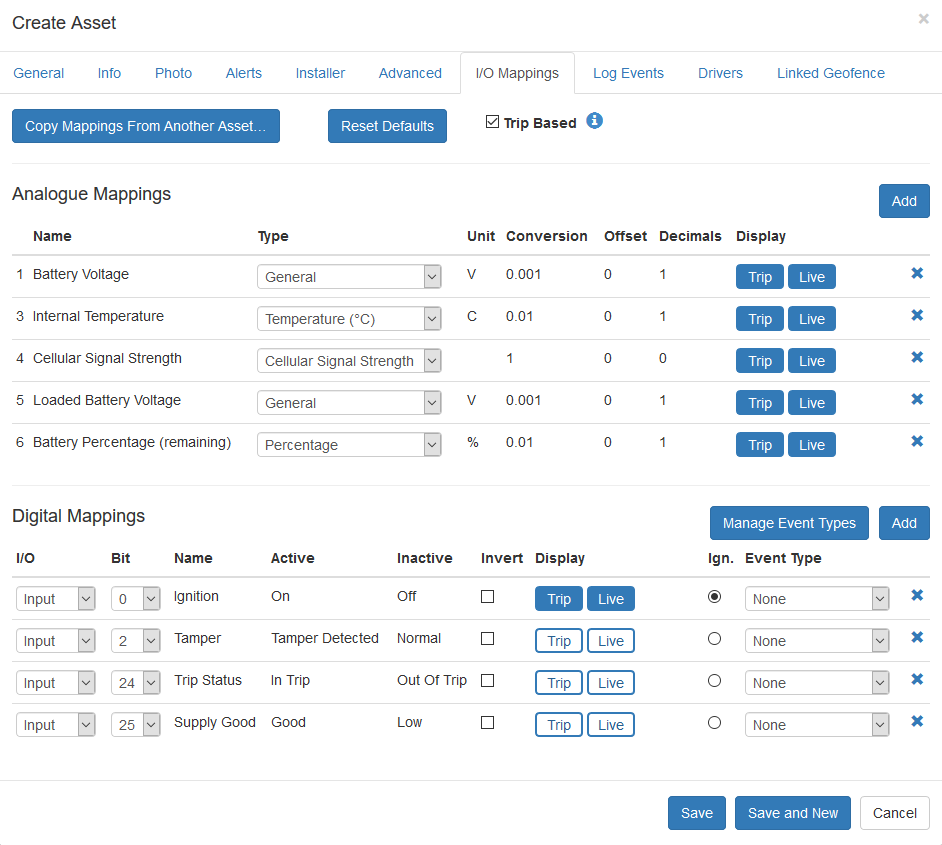
Telematics Guru receives the same raw data as 3rd party platforms, but the data is manipulated slightly, such that the status flags 0-7 are mapped to Digital Inputs 24-31 (see image at end of page)
| Analogue Input Number | Name |
| 1 | Battery Voltage |
| 2 | - |
| 3 | Internal Temperature |
| 4 | GSM Signal Strength |
| 5 | Loaded Battery Voltage |
| 6 | Battery Percentage (remaining) |
| 11 | Reserved for Fuel Gauge |
Telematics Guru Mappings
Default Settings
By default, the Remora2 is setup for trip tracking. The following default settings apply:
- Out of Trip:
- 12 hour heartbeats. This is a GPS point and an upload every 12 hours.
- In Trip:
- Start trip threshold of 250m
- Upload on trip start.
- GPS points every 2 minutes
- Upload every 30 minutes.
- End a trip after 5 minutes of no movement.
- Upload on trip end.
These settings and many more are configurable in the OEM Admin Interface. The defaults provide a good starting point. It is important to monitor and tweak your settings to ensure the battery life is acceptable. Incorrect settings can flatten the batteries quickly. Contact Support for help with this.
Magnetic Tamper Detect
The Remora2 can wirelessly detect tampering and comes with the magnet as standard. The magnet fits into a recess underneath the housing and should be glued securely to the asset. The Remora2 will then log a tamper and upload if the magnetic field is lost and will log into Digital Input 1 with the uploaded information.
