Geofence Downloads to Device
Table of Contents
Geofences can be downloaded directly from the server onto supported devices, allowing for a wide range of applications, including:
- Setting custom speed limits on private property, such as a mine site, and triggering a buzzer when the driver exceeds the limit.
- Turning on a vehicle's emergency lights in a specific area.
- Disabling cellular communication (and GPS fixes for a period of time) in a sensitive area, such as at an airport, or on an oil rig.
- Using alternate logging parameters to increase battery life
For basic geofence settings, such as creating geofences and setting entry/exit alerts, please see the article here. Simply generating entry/exit alerts does not require the 'download to device' functionality to be configured.
See Geofence to Device Download Video
Geofence downloads are fully integrated with Telematics Guru. Check the product datasheet (available on digitalmatter.com) to see if a particular product supports Geofence Downloads. Most of our cellular range does.
Device Support and Geofence Storage Capacity
- NB - the maximums below are a limitation in device RAM, and cannot be increased via a FW change.
- These are absolute maximums of each.
- There is a relationship between the average number of points in all geofences and the maximum number. If you have less points per geofence, you will be able to store more geofences. If you have a high number, you won't be able to reach the absolute max number of geofences. To reach the max, go with simple geofences - i.e. squares, 4 points.
- Ensure to update devices to the latest firmware to take advantage of new features and performance improvements
| Device Name | Maximum Storage |
|---|---|
| Arrow Global BLE |
|
| Barra GPS |
|
| Dart2 |
|
| Dart3 |
|
| Eagle |
|
| Falcon |
|
| G62 |
|
| G70 |
|
| G100 |
|
| G120 |
|
| G150 |
|
| Oyster v1 3G |
|
| Oyster2-4G |
|
| Oyster3-4G |
|
| Oyster3-4G Bluetooth |
|
| Oyster3-Global |
|
| Manta-Fusion |
|
| Remora 3G |
|
| Remora2 |
|
| Remora3-4G |
|
| Remora3-Global |
|
| Yabby3 |
|
| Yabby GPS |
|
Geofence downloads are not available on the “Edge” range of devices, as their location is resolved server side via the Location Engine - so the device is unable to determine locally if it is inside/outside a Geofence.
Configuring Geofence Downloads
First the device must be configured to download the Geofence via Device Manager:
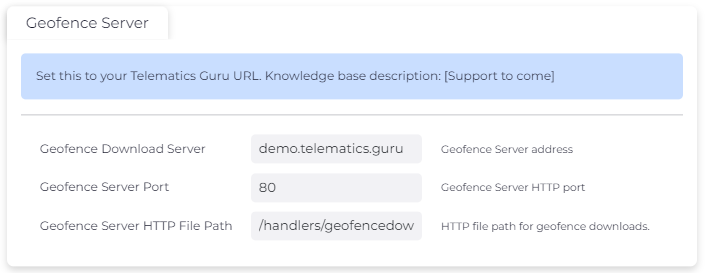
- Edit the Admin Parameters of the device and add the "Geofence Server" tab.
- Ensure your device has the correct firmware version.
- Change the "Geofence Download Server" to your custom Telematics Guru URL and click Update.
If you're not sure of your URL, you can see it in Telematics Guru >> Admin >> Url Manager.
Once the device has checked into Device Manager and downloaded the new parameters, the 'Admin' tag in 'Pending Updates' column will disappear.
Telematics Guru: Enabling Geofence Downloads
While creating your asset from new, or editing an existing asset;
- From Assets->Manage Assets, and click on the Asset name, or the cog menu on the right and select 'Edit'.
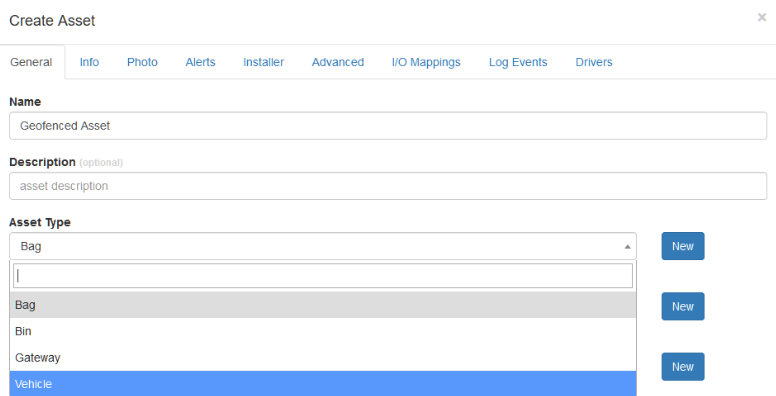
- Since Geo-fence download parameters are grouped by 'Asset Type' in the General Tab of the Edit Asset screen you can set the desired asset type.
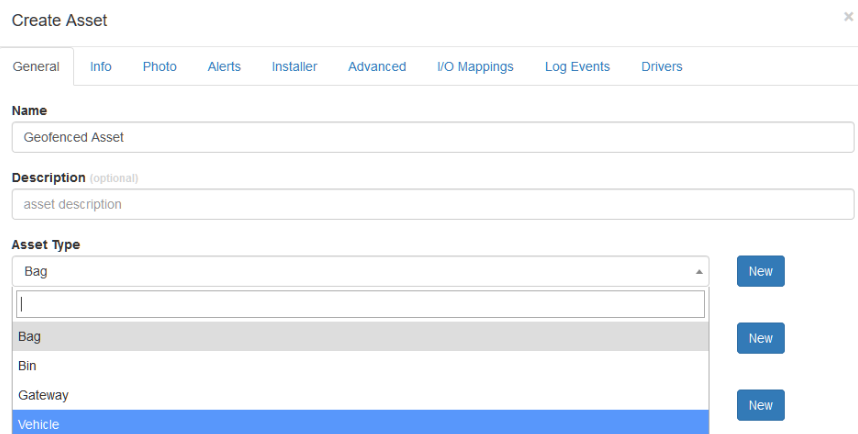
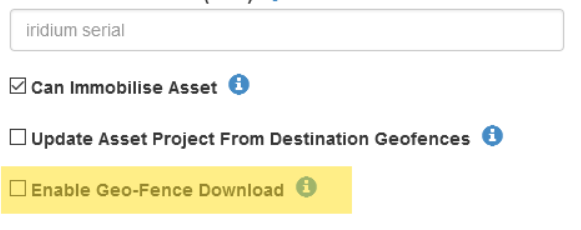
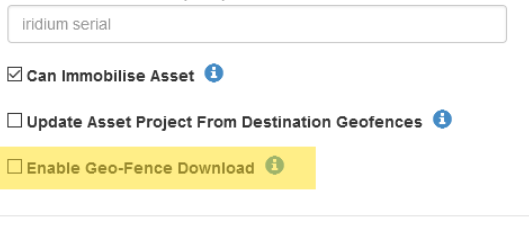
Then select the 'Advanced' tab and Tick "Enable Geo-Fence Download" on the Edit Asset screen, this gets the device to look for the Geofence download from Device Manager
Geofence Asset Types
The Geofence downloads are grouped by asset type, allowing for intelligent management, and fast application of this feature. The process for configuring a Geofence download for an asset type is as follows:
Navigate to Admin->Asset Type Geo-Fences and select the desired asset type. (An individual 'Asset Type' is created in Admin > Asset Types, and assigned in Assets > Asset Manage)
- Click "Create Geofence Asset Type Setting"
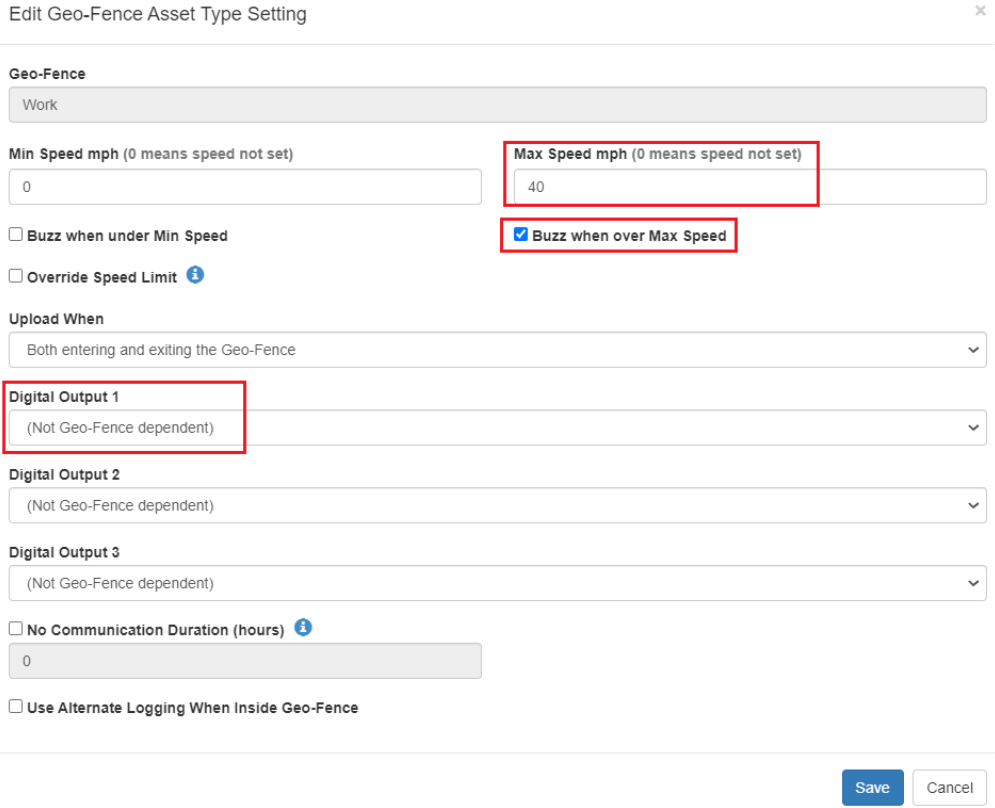
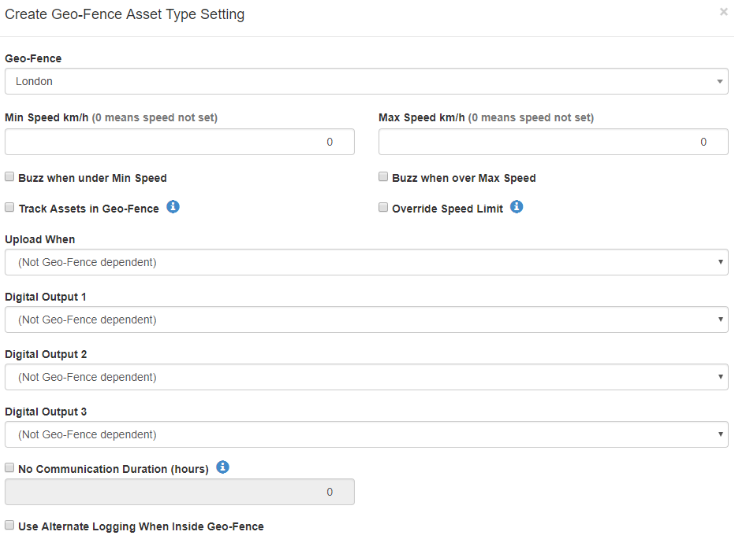
- Select a Geofence to download and edit the desired fields. Not all features are available on all devices (for example, the Oyster does not have outputs, and so the 'Digital Output Settings' will have no effect).
- Click save, and repeat for each Geofence to download
Additional Geofence settings
Speed Settings
-
The minimum and maximum speed can be set for the geofence, and the device can be configured to buzz if its speed is not between the limits, alerting the driver that they must either speed up or slow down, depending on the situation. This buzzing option is only available/relevant for devices with either an internal buzzer, or digital outputs that have been configured to act as a buzzer, i.e. Dart3, G70, G120
See Connect an External Buzzer/LED for how to wire in and configure a buzzer for use with this feature.

The speeds can also be used to override the speed limits on Telematics Guru if the "Override Speed Limit" checkbox is ticked. If so, then Telematics Guru will use these speeds in the speed banding calculations (TG Pro required). For further information click on the following link: Speed Monitoring in Telematics Guru.
-
Upload Settings
The moment a device recognizes it has entered or exited a Geofence (dependant on the logging parameters), it can be configured to upload, which in turn could be used to trigger an alert (either an SMS or email). For information on how to set an alert on Telematics Guru, please consult: Configuring an Alert
-
Digital Output Settings
Digital outputs can be set based on whether a device is inside, or outside specific Geofences. This could be useful if you wanted to turn on a vehicle's emergency lights in a designated area.
-
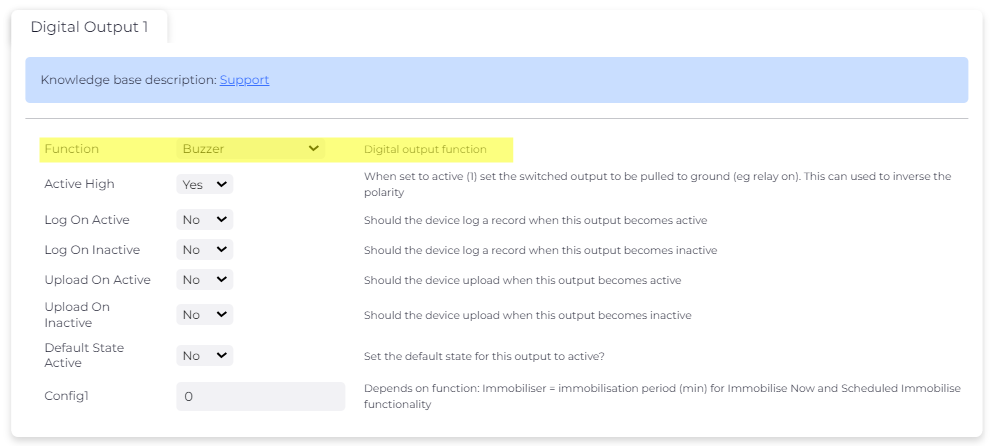
Digital outputs must be set system parameters via OEM server so that their function is "Digital Output" for this to work.
This feature will only take effect if digital outputs are supported by the device. If you are unsure, please consult the relevant device datasheet.
See Digital Outputs
-
Communication Settings
If the device gets a GPS fix inside a no communications Geofence, then it will not use cellular communications until it gets a GPS fix outside the fence. If the duration is not set, or set to 0, then the device will operate normally with trip tracking and periodic GPS fixes, with the exception that it will not attempt an upload.
If the duration is set to anything other than 0, then the device will not attempt any GPS fixes or any uploads. It will go to sleep and not monitor anything until the time period expires. Once the timer has expired, the device will attempt to get a GPS fix. If it is still inside the fence or the fix fails, it will sleep for the same period of time, otherwise, if it is outside, the device will continue as normal.
-
Alternate Logging (Device Manager server)
-
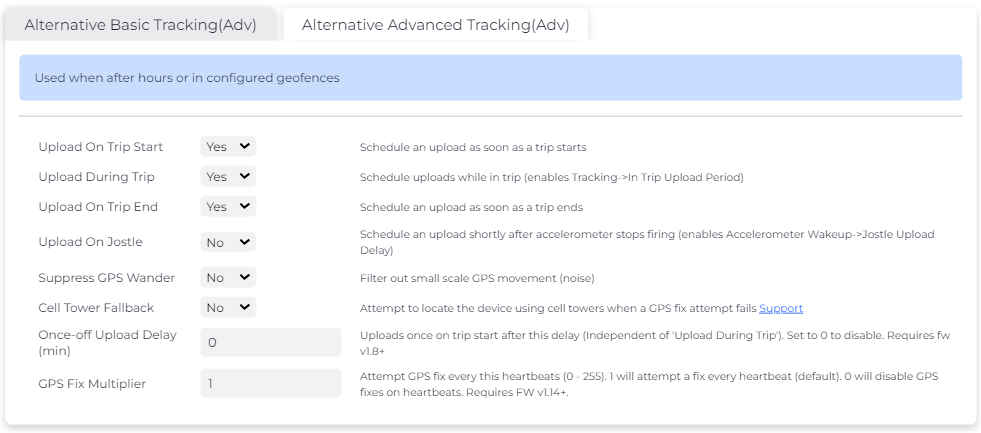
If this is set, the device will use the alternate set of geofence logging system parameters configured on Device Manager while inside the Geofence. This can be used to intelligently manage the battery life of a device.
For example, upload infrequently when inside a Geofence, and more regularly when outside (off site)
Geofence Heartbeat and Geofence Logging
Applies to Dart3 Global and Arrow Global BLE
Similar Alternative Heartbeat and Alternative Logging, the Dart3 Global and Arrow Global BLE also offer alternative logging when within a geofence. These settings can be defined in the device system parameters and may be used to intelligently manage the battery life of a device.


FAQ/Troubleshooting
How do you tell which version of the Geofence is downloaded?
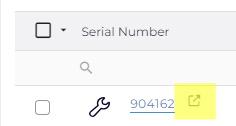
In Device Manager, access the details page of the device by clicking on the link on the left hand side of the device grid
Then scroll down until you see the device slots:

The version number that is displayed is an encoded date time, which you can use the calculator here to decode. In this case, 217919263 comes out to: 2019-11-28T05:07:43.000Z
When you have one Geofence inside another, which takes priority?
Geo Fences with a Higher priority are shown preference over those with a Lower priority. Where two Geo-Fences overlap with the same priority, the fence with the smallest area will be shown preference.
What triggers an update of the Geofence List?
If you add a geo-fence, edit a geo-fence or change a geo-fence asset type setting, it will result in the geo-fence list being updated. Once the geo-fence list has been updated, when the device next connects it will receive a message that will indicate to the device that it needs to download a new geo-fence list. The time it takes to update the device is dependent on when the device next connects after the geo-fence list has been updated.
Configuration Examples
Buzz if asset is travelling at >40km/h inside a Geofence
Device Manger Server System Parameters

Telematics Guru: Enabling Geofence Downloads and Set Asset Type
Configure a Buzzer
Connect an External Buzzer/LED
Configure Geofence Asset Type Settings
