Setting up a Yabby Edge LoRaWAN Device via Everynet

Written by Matthew Clark-Massera
Updated at February 3rd, 2023
Table of Contents
1. Setup your Yabby Edge LoRaWAN devices using the LoRaWAN Provisioning Tool
The LoRaWAN provisioning tool can be downloaded here.
Please see Yabby Edge LoRaWAN - Configuration and Usage.
Note: It is important to configure the Region and Scanning parameters.
2. Setup the API Credentials on OEM
Navigate to the 'Manage' dropdown on OEM and click on 'API Credentials'. Select 'New' and generate the API key. Once created the key can be copied. Both Key 1 and Key 2 will need to be generated to save the API credentials. Once both are generated, select 'OK' to save them.

3. Login to your Everynet Network Server
Browse to Everynet Network Server front page and login.
4. Add the device to the Everynet Network Server
Browse to the 'Device' section in Everynet. Input the DevEUI, AppEUI, Create a Tag, AppKey, and select the band/region. Once all information is created, the device can be saved. The tag will allow you to create a filter to associate the device to the connection.

5. Create a Filter in Everynet
Set up a filter to associate the device with the connection. Input the same device tag that was created in Step 4. The filter ID will be used in the next step.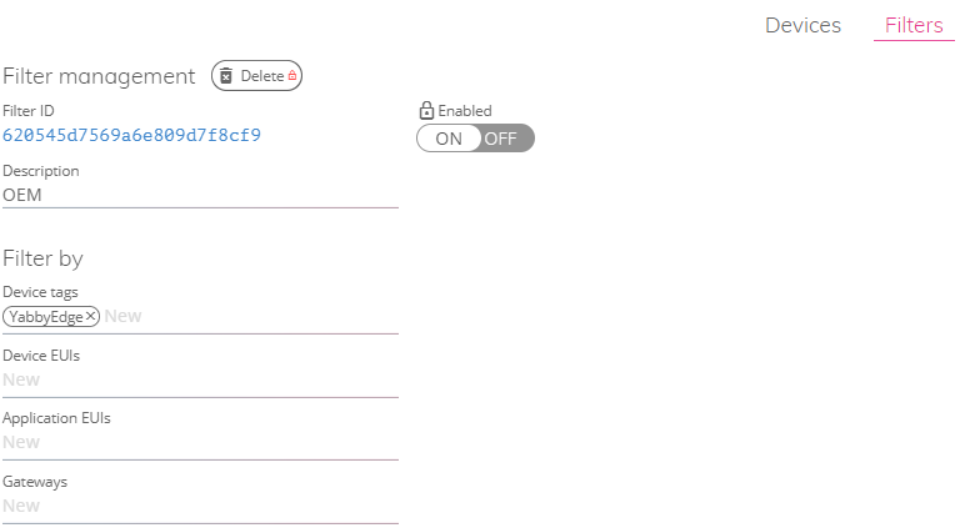
6. Add your connection to Everynet
Browse to the 'Connections' screen in the console and click on HTTP. The fields filter, Application URL, and Authorization header will need to be completed.
- Filter - The ID that was generated in Step 5
- Application URL - https://oem-event-processors.azurewebsites.net/api/LoraEverynet
- Authorization header - Bearer and then API Key that is generated in Step 2. E.g. Bearer 9kBL5Ve2U-oJ00OmBrZ0m5.8fTrkSm1gnx1n_sSB1qRrwlVBJoEY1yS_1xvTyR0xIPg.1
Once the connection has been saved, the connection ID is provided in the connection management details. This ID will be needed for completing the OEM set up.

7. Create your Access Token in Everynet
To complete the set up in Everynet as well as the LoRa Network Credentials in OEM, an Access Token will need to be created. Browse to the 'Keys' section within the console. Input a name for the key in the description field and enable the permissions by selecting "All" on each. Once that has been done, the key can be saved and the Access Token will be generated. 
Downlink_request
downlink_request must be enabled. This can be found under 'Filters'.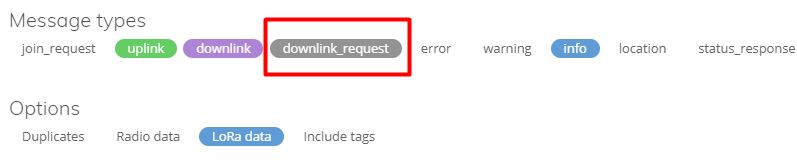
8. Add application server security details on OEM
- Navigate to 'Manage' dropdown on OEM and click on 'LoRa Network Credentials'
- Click 'New' to create a new entry
- Select the relevant Distributor/Vendor/Client
- Enter a name for the network credential entry
- Select 'Everynet' from the LoRa Network Code dropdown
- Enter the Connection ID (Found in the connection details created in Step 6)
- Enter the Access Token (token created in Step 7).
- Enter the base URL https://adapters.ns.< your_region >.everynet.io/http2/cb/< your_connection_id >, E.g. https://adapters.ns.us.everynet.io/http2/cb/62052e1767a8b24da1d76dfa

9. Create a Forwarder on OEM
This step is only relevant if you need to forward data to your own platform. Forwarders for Telematics Guru are already created.
A Forwarder is an HTTP connector which allows the Location Engine to forward the "solved" device data to an end platform. Browse to Forwarders on OEM and click 'New'.
10. Set the Location Engine Lookups and Forwarder
Browse to LoRa Devices on OEM and select your devices.
- Click on 'Device Operation' and 'Set Network Credentials'. Select the entry you created in Step 8.
- Click on 'Device Operation' and 'Set Location Engine Lookup Settings'. Select Default Profile. This profile will cover 99% of use cases. Test on this profile initially, if you have specific requirements, speak to your support team to have the profile adjusted if this is required.
- Click on 'Device Operation' and 'Select Forwarder'. Select the TG forwarder for your region or the entry you created in Step 9.