Setting up a Yabby Edge LoRaWAN Device via Helium

Written by Matthew Clark-Massera
Updated at February 3rd, 2023
Table of Contents
Known Limitations/Issues
There are currently some limitations/issues on the network server end for this integration. The Yabby Edge LoRaWAN relies quite heavily on downlinks in order for the Location Engine to be able to send key positional and timing information down to the device.
- Due to network lag, if you are outside of America, downlinks usually just don't work at all (apart from the Join Accept). To fix this, specific profiles must be applied, covered in steps 5 and 6 below.
- On Helium, many of the uplink / downlink pairs are duplicated. This isn’t a major issue
1. Setup your Yabby Edge LoRaWAN devices using the LoRaWAN Provisioning Tool
The LoRaWAN provisioning tool can be downloaded here.
Please see Yabby Edge LoRaWAN - Configuration and Usage.
Note: It is important to configure the Region and Scanning parameters.
2. Setup the API Credentials on OEM
Navigate to the 'Manage' dropdown on OEM and click on 'API Credentials'. Select 'New' and generate the API key. Once created the key can be copied. Both Key 1 and Key 2 will need to be generated to save the API credentials. Once both are generated, select 'OK' to save them.
3. Signup for a Helium Console account
Browse to Helium Console front page and click 'Sign Up' if you are not already registered. Follow the prompts and complete the email verification step.
4. Open the Helium Console
The console is where you register your devices, create an HTTP integration, set up a label and set up forwarding to your desired endpoint. It is accessed at Helium Console.
5. Create a Profile
A profile is a set of options that you can apply to your devices . To improve downlink reliability, you must use a profile to increase the Rx Delay setting. We recommend a value of 5 seconds in America, and 10 seconds internationally. Devices outside of America are unlikely to work at all without an increase in the Rx Delay, as network lag generally prevents delivery of downlinks within the default delay of one second. You should also enable ADR and the CFList, as the Yabby Edge supports and benefits from both. 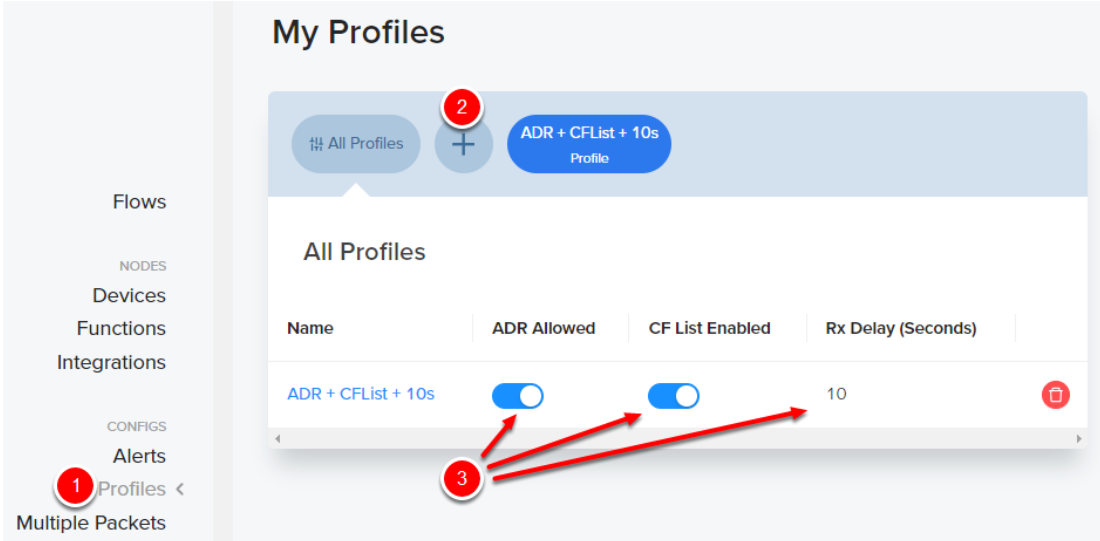
6. Add a Label
Labels are used in Helium Console to organize devices, assign to specific integrations, and apply profiles. You can use the label to apply the profile created in the previous step, and to connect to Telematics Guru later in Step 9.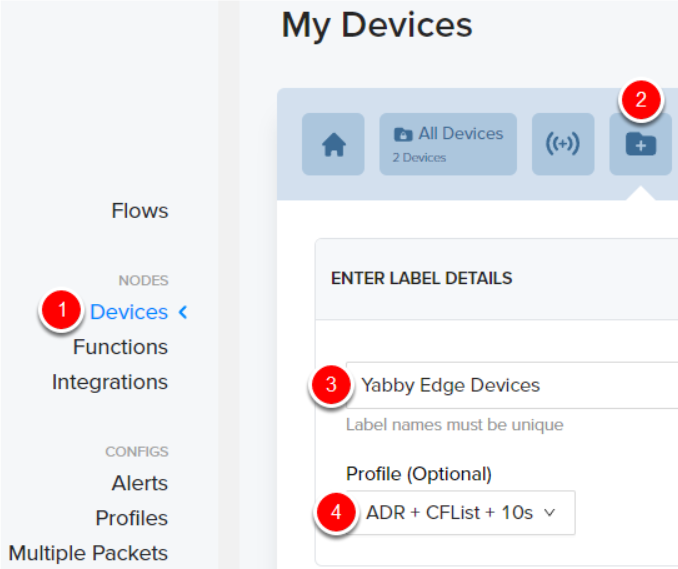
7. Add your device to the Helium Console
Browse to the Devices screen in the console and click on add new device. The fields Dev EUI, App EUI, and App Key will be auto generated, but you will need to replace the generated values with the credentials provided with your device. You can copy and paste the values from the DevEUI window in the LoRaWAN Provisioning Tool. Finally, attach the label that was set up in Step 6.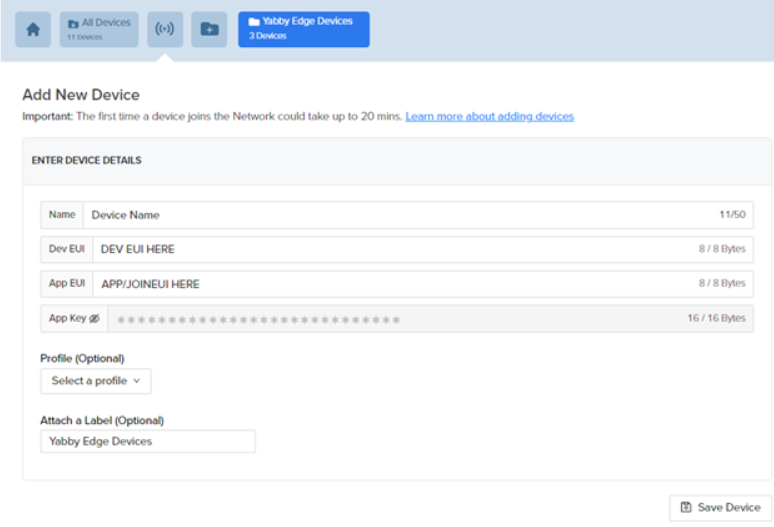
8. Add your integration in Helium
Browse to the Integrations screen in the console and select Add New Integration. Click 'HTTP' under the Add a Custom Integration section. The fields Endpoint, Header, and Value will need to be filled out.
The Base URL: https://oem-event-processors.azurewebsites.net/api/LoraHelium
Header will need to be input at Authorization
The value will be Bearer and then the API Key generated in Step 2 above.

9. Add Flow within Helium to connect devices to your integration
Browse to the Flows section within Helium. Flows is a visual-centric view of the key elements in Console. This allows users to instantly understand the relationship among devices, functions, and integrations.
- Select Nodes -> Labels -> click and drop the label into the field that was set up in Step 5
- Select Nodes -> Integrations -> click and drop the integration set up in Step 6
- Connect the two nodes together
All devices inside the label will now be associated with the integration. 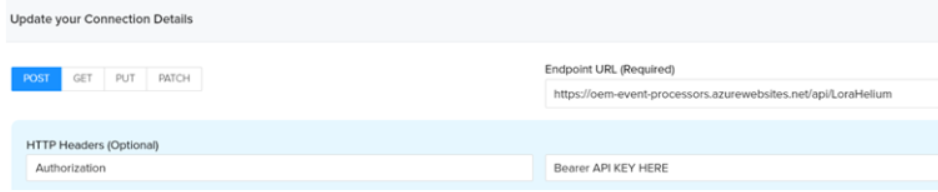
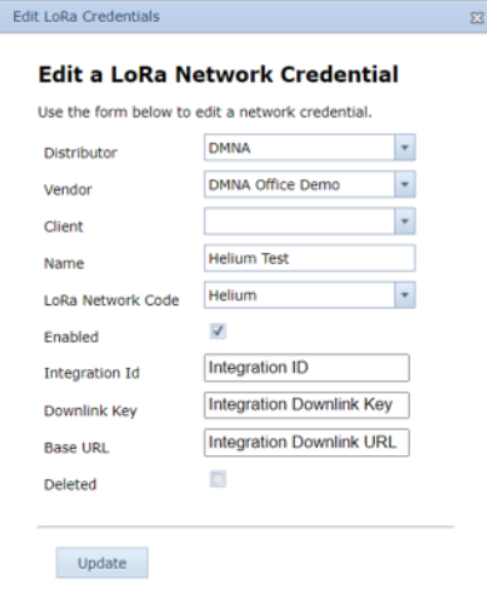
10. Add application server security details on OEM
- Navigate to 'Manage' dropdown on OEM and click on 'LoRa Network Credentials'
- Click 'New' to create a new entry
- Select the relevant Distributor/Vendor/Client
- Enter a name for the network credential entry
- Select 'Helium' from the LoRa Network Code dropdown
- Enter the Integration ID and Downlink Key. Details are found in the integration details that were created in Step 8.
- Enter the base URL https://console.helium.com/api/v1/down
11. Create a Forwarder on OEM
This step is only relevant if you need to forward data to your own platform. Forwarders for Telematics Guru are already created.
A Forwarder is an HTTP connector which allows the Location Engine to forward the "solved" device data to an end platform. Browse to Forwarders on OEM and click 'New'.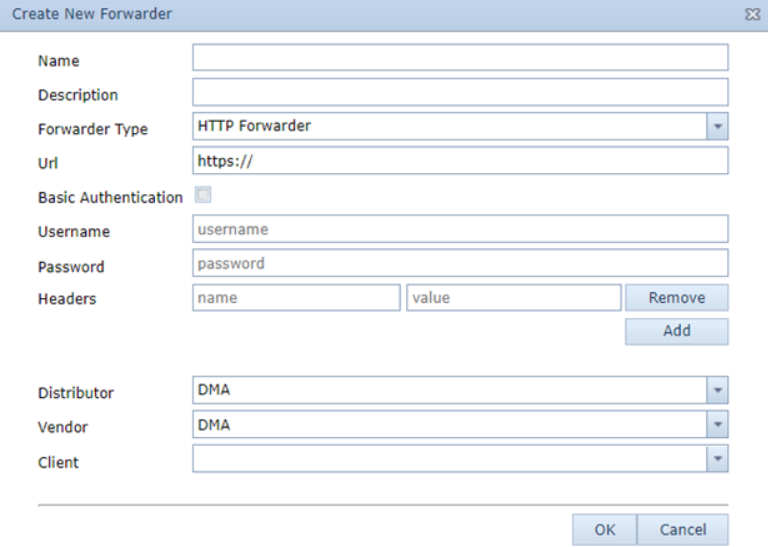
12. Set the Location Engine Lookups and Forwarder
Browse to LoRa Devices on OEM and select your devices.
- Click on 'Device Operation' and 'Set Network Credentials'. Select the entry you created in Step 10.
- Click on 'Device Operation' and 'Set Location Engine Lookup Settings'. Select Default Profile. This profile will cover 99% of use cases. Test on this profile initially, if you have specific requirements, speak to your support team to have the profile adjusted if this is required.
- Click on 'Device Operation' and 'Select Forwarder'. Select the TG forwarder for your region or the entry you created in Step 11.